Showing posts with label dessert. Show all posts

Thursday, October 22, 2015

{Clean Eating} Cinnamon Rolls with Cream Cheese Icing

This started as a challenge...one of the Beachbody coaches on my team asked if anyone had a recipe for 21-Day Fix approved cinnamon rolls and I just had to give it a shot.  And while I can't say that they are 21-Day Fix approved, I can say that these clean eating cinnamon rolls (with cream cheese icing no less!) really are as close to the real deal as I can get...


I have a recipe on my blog for Cinnamon Rolls already and I firmly believe you can "clean" up almost any recipe if you know what substitutions work for different ingredients.  White whole wheat flour for all-purpose flour, honey for sugar, coconut sugar for brown sugar in the filling...it all worked great!  


So my final recipe was a "take-two"...the first time I tried it, the dough was a bit dried out and overall, they weren't as sweet as I had hoped.  My children did not mind.  They devoured them.  And how lucky for them that I couldn't let this rest until I got it right?  Let's just say I'm kind of over cinnamon rolls for awhile... ;) 


On the second attempt, the dough was MUCH better.  Soft and sweeter and yummy!  Even the next day, after sitting in the fridge, they completely softened up when popped in the microwave.  


Keep in mind that this recipe takes a long time...hours in fact!!  Lots of time to let the dough rise.  It's a fun project if you have kids.  They loved seeing the dough get bigger and the rolls plump up.  My 5 and 3-year old were also great rollers and helped spread the filling.  A fun weekend activity for all! 


I added just a little of cinnamon to the icing.  This is optional, but I liked seeing the warm little specks of the spice in the icing.  It actually makes a lot, so even after I iced them twice, we still had some left over to drizzle over top (if necessary).  These may be "clean" but they are definitely a treat!

The process is long, but I swear it's worth it!!  I hope you enjoy them as much as we did.  If you have any questions, comment and I'll get back to you as soon as I can! 

Makes 12 rolls

{Clean Eating} Cinnamon Rolls with Cream Cheese Icing

1 packet fast-rising yeast
1 cup of fat free or almond milk, room temperature
1/3 cup honey
3 tablespoons coconut oil, softened
2 tablespoons warm water
1 egg
1 teaspoon vanilla 
1/2 teaspoon sea salt
3 1/2 - 4 cups white whole wheat flour (+ more for rolling)

Filling
1/4 cup coconut oil
1/2 cup coconut sugar
1/2 cup honey
2 tablespoons pure maple syrup
2 tablespoons cinnamon 

Cream Cheese Icing 
4 oz. cream cheese, room temp
1/4 cup honey
2 tablespoons pure maple syrup
1 teaspoon cinnamon (optional)

In the bowl of a stand mixer fitted with the paddle, combine the yeast, milk, honey, coconut oil, water, egg and vanilla and mix on low.  Add the salt and about 3 cups of the flour and mix on low until just combined.  Switch to the dough hook and add the additional flour 1/4 cup of a time until the dough pulls away from the sides (will still be a little sticky).  Continue kneading for about 5 more minutes.  

Spray a large bowl with non-stick cooking spray and place the dough ball in, turning a few times to coat with the oil.  Cover with a clean kitchen towel and place in a warm spot for 1 hour to let the dough rise.  Punch down the dough, then let it rise again for another hour.  

Punch down the dough and transfer to a lightly floured work surface. Roll the dough out to approximately 14 x 22 inches.  Spread coconut oil onto dough leaving a 1-inch border on one of the long sides.  

Make the filling:  combine the coconut sugar, honey, maple syrup and cinnamon in a bowl and spread evenly over the coconut oil on the rolled out dough, making sure to leave that 1-inch border untouched.

Roll the dough into a log, ending with the untouched dough on the bottom to seal the whole thing together.  Cut off the uneven ends, score your dough every 2 inches and then cut through using those marks.  Place parchment paper in the pans you are using (I used those throw away foil pans) and then spray with non-stick cooking spray.  Cover with a dish towel and let them rise again for another hour.  
Bake at 350 degrees for 18-20 minutes until the tops are golden brown.

While they are baking, make the icing.  In a medium bowl, using an electric mixer, combine the cream cheese, honey, maple syrup, vanilla and cinnamon until smooth.  Scrape down the sides and mix again briefly.  

Once you pull the cinnamon rolls out the oven, frost with half of the amount of icing made (it will melt down into the rolls).  Then once they have cooled, frost again with the remaining icing.

Print Friendly and PDF

Wednesday, September 9, 2015

Healthier Pumpkin Chocolate Chip Bars

One of my favorite things to do lately is to go back through old recipes on my blog and try to "clean" them up a bit.  These healthier pumpkin chocolate chip bars are exactly what I have done here.  And if I do say so myself, I knocked this one out of the park!


I replaced the white sugar with coconut sugar and honey, used white whole wheat flour to replace the all-purpose flour and I seriously cannot tell a difference between these and the old version.  They are just as dense and brownie-like and SO good!   


I just made these two days ago and the entire pan is almost gone.  They are TOO good!  Dangerous to keep around (even if they are healthier!).  I kept mine in the fridge and I swear every time I opened it up, I would sneak a piece off of one of the bars.  It adds up, believe me!  But my kids love them and it feels good to give them a yummy snack that is not full of processed sugar.

Makes 24 bars

Healthier Pumpkin Chocolate Chip Bars

1 cup organic unsalted butter, room temperature
3/4 cup coconut sugar
3/4 cup honey
1 egg
2 teaspoons vanilla extract
1 cup canned pumpkin puree
2 cups white whole wheat flour
1 tablespoon pumpkin pie spice
1 teaspoon baking soda
3/4 teaspoon sea salt
1 package (12 oz) dark chocolate chips

Preheat oven to 350 degrees and spray a 9 x 13-inch baking pan with non-stick cooking spray.  In the bowl of a stand mixer, cream butter, coconut sugar and honey until smooth.  Add egg and vanilla and beat until combined.  Mix in pumpkin puree.

Combine the flour, pumpkin pie spice, baking soda and salt in a small bowl.  On low speed, mix dry ingredients into wet until just combined.  Fold in chocolate chips.

Spread batter evenly in pan and bake until a toothpick inserted in the center comes out almost clean, about 30-35 minutes.  Cool completely in pan.  Cut into 24 squares.

Print Friendly and PDF

Wednesday, May 7, 2014

Cadbury Mini Egg Blondies

Wondering what in the world to do with all the leftover Easter candy?  I say turn it into a cookie!  These blondies are out of this world.  They were gone in less than day.  


Cadbury Mini Eggs...you know those chocolate eggs with the candy shell?  They are mixed throughout a buttery blondie batter.  I'll say it again, seriously, out of this world. 


And now I'll tell you the real reason I'm posting this after Easter.  Because I had every intention of posting this before Easter to share with you all!  My oven went caput two days before the Holiday.  Actually pretty much as I was trying to bake my first batch of these.  They were taking forever and I didn't realize that my oven was barely hot!  In fact, I finally took them out after 35 minutes because the top seemed done but they were complete mush underneath. 

Well, we ended up needing a new element, and I just had to make these again when my oven was fixed.  From the little taste of the corner that I got from the ruined batch, I knew that these were sure to become an Easter tradition in our house!  Can't wait until I can get this candy next year! 

Makes 16 bars

Cadbury Mini Egg Blondies

2 sticks butter, room temperature
3/4 cup sugar
3/4 cup light brown sugar, packed
2 eggs
1 teaspoon vanilla extract
2 cups flour
1 teaspoon salt
1 teaspoon baking soda
1 (10 oz) bag of Cadbury Mini Eggs

Preheat oven to 350 degrees.  Grease a 9 x 9-inch baking pan with non-stick cooking spray.  In the bowl of a stand mixer, cream the butter and sugars together until light and fluffy.  Add eggs, one at a time, mixing to incorporate after each one.  Add vanilla and mix to combine.  

In a small bowl, combine flour, salt and baking soda.  Gradually add flour mixture to wet mixture until combined.  Remove bowl from stand mixer and add chocolate eggs, stirring by hand.

Pour batter into prepared pan and smooth the top to make it level.  Bake for 20-25 minutes until the top is golden brown.  It's best to leave these underdone so if you use a toothpick to check the center, it shouldn't come out completely clean. 

You may also like:


Print Friendly and PDF

Friday, April 25, 2014

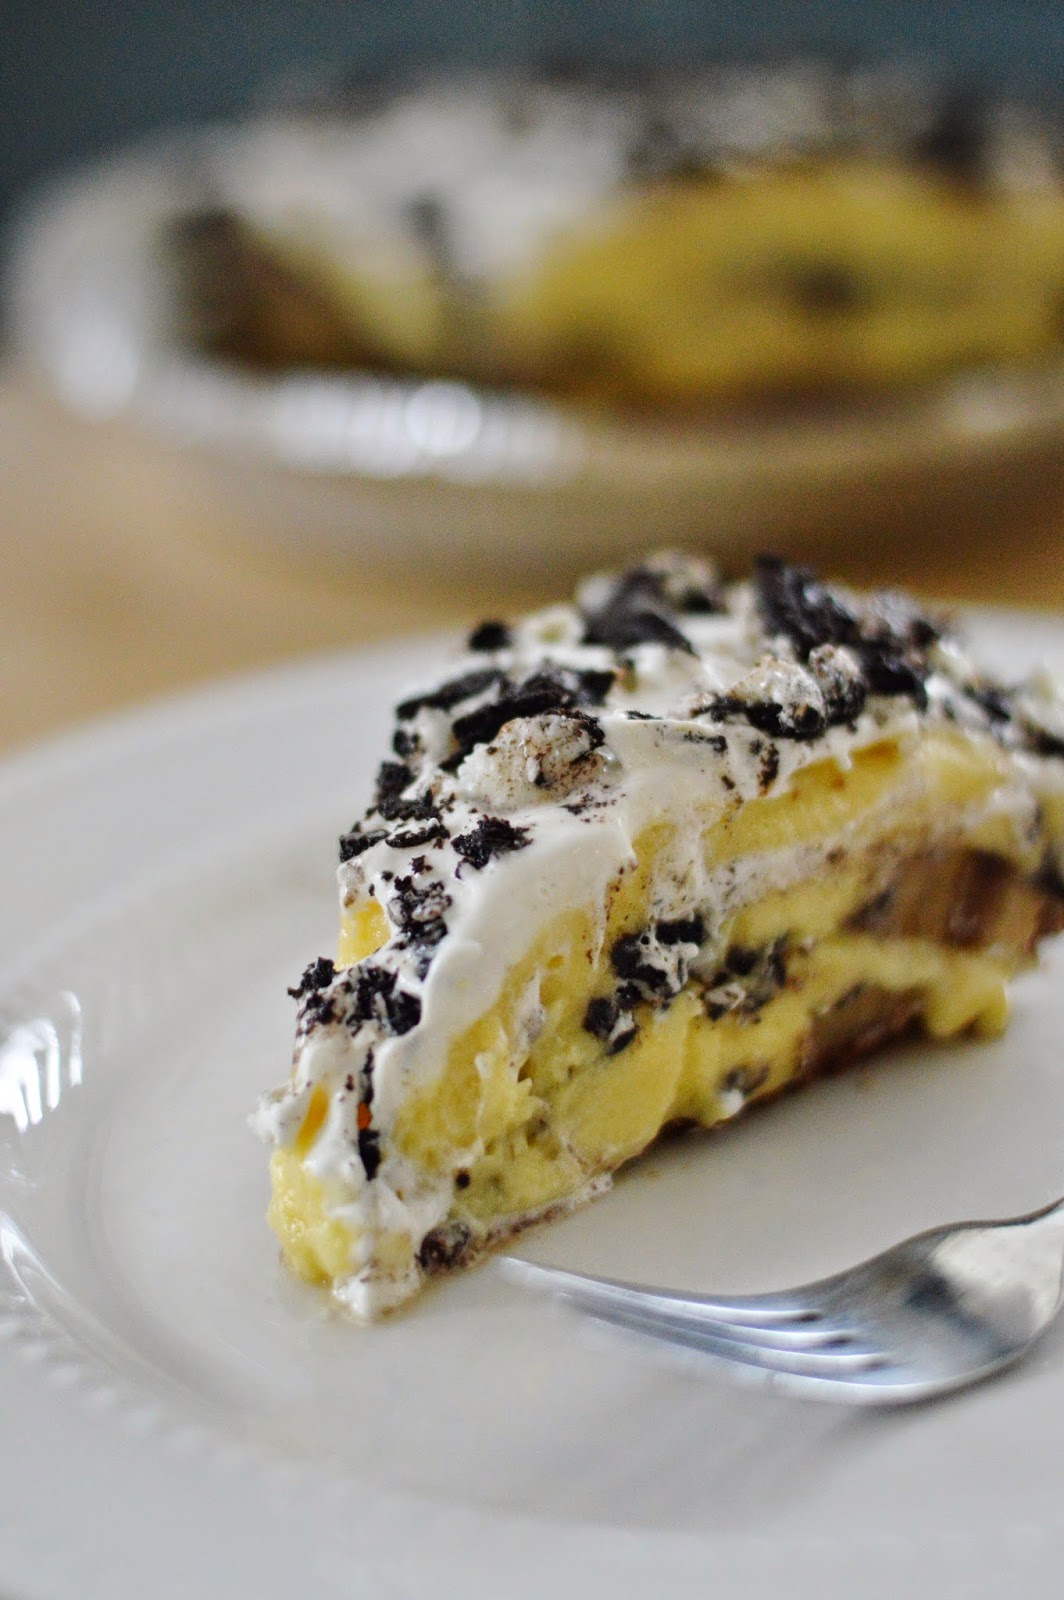
Oreo Banana Cream Pie

I make a banana cream pie or some version of it every year for my husbands birthday.  One year, I made this Banana Pudding Poke Cake (one of the most popular recipes on my blog!).  This year, he wanted both a banana cream pie and my Double Layer "Dirt" Cake (you gotta check this one out too)...I think he just couldn't decide.  Me being the wonderful wife I am, agreed.  


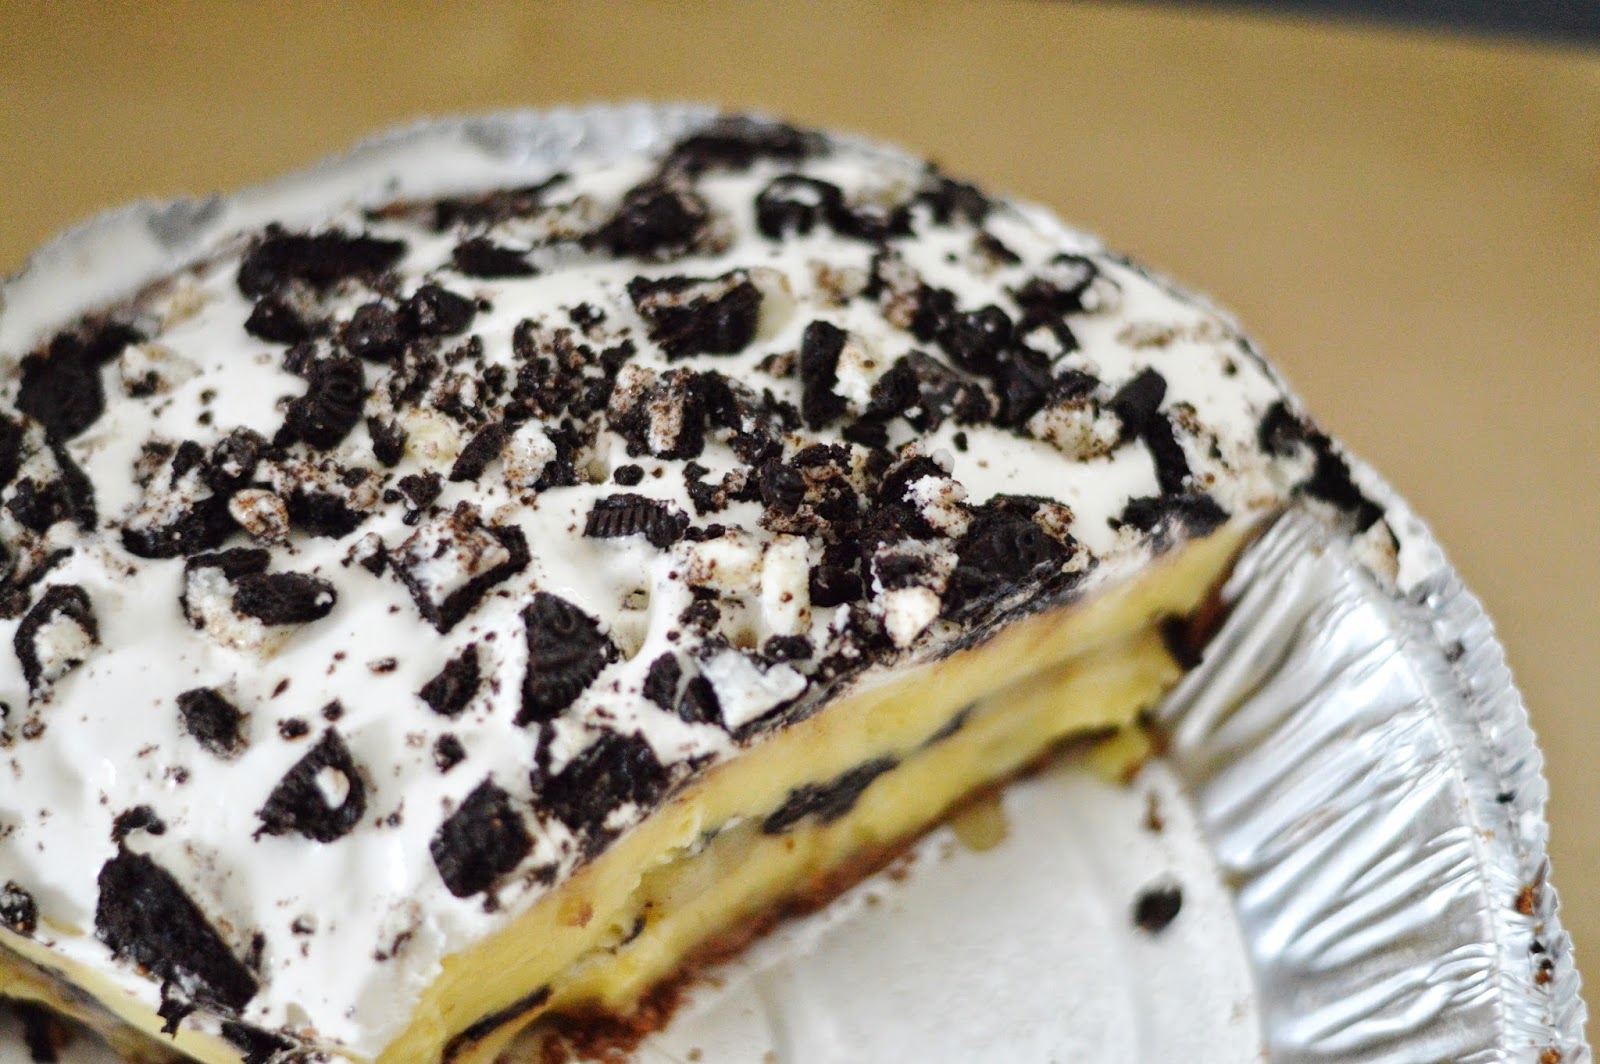
Fast forward to baking day and I discover that most of the Oreos for the "dirt" cake were missing.  Ah-hem, husband...guess you didn't want that cake THAT bad.  Since I had some of the Oreos plus all of the ingredients for the banana cream pie, I decided to sort of combine the two.  Wow, SO glad some of the cookies went missing - this pie is amazing!  


Pudding in pies or cakes is my favorite.  Add a bit of crunch from the cream filled sandwich cookies and what you have is pure bliss.  So delicious!  And I love the fact that it's no-bake.  Easy!  


I started with a chocolate graham cracker crust (and made it easy on myself by using a ready to use one).  That gets layered with bananas, pudding, cookies, more bananas, more pudding, Cool Whip, then more cookies.  I'll say it again - ah-mazing!!  

Serves 8

Oreo Banana Cream Pie

1 ready-to-use chocolate graham cracker pie crust
2 ripe bananas, sliced, divided in half
2 (4 serving) packages banana pudding flavor instant pudding
2 1/2 cups cold skim milk
2 cups Cool Whip, thawed, divided in half
20 Oreos, crushed, divided in half

Place half of the bananas in the bottom of the pie crust.  Combine pudding mixes and mix in a large bowl.  Whisk for 2 minutes or until well blended.  Gently fold in 1 cup of the whipped topping.  Spoon half of the pudding mixture in the crust, over the bananas.  Top with remaining banana slices and sprinkle on 1/2 of the crushed Oreos.  Cover with remaining pudding mixture.  

Refrigerate 3 hours or until set.  Top with remaining Cool Whip, then sprinkle on remaining Oreos.  Serve cold and store leftovers covered in fridge.  

You may also like:


Print Friendly and PDF

Wednesday, April 16, 2014

Peanut Butter Double Chocolate Chip Cookies

I'm so in love with this cookie!  A chocolate cookie with peanut butter chips AND chocolate chips.  I love that bite of extra chocolate you get from biting into one of the chocolate chips.


This is a crispier cookie, with a softer center - at least that's when they are best.  So don't over bake!  Pull them out when the edges look done, but they will still be gooey in the middle.  


The dough is pretty thick and the cookies don't spread out much.  So if you want a thinner, crispier cookie, flatten them with your fingers after you drop the dough onto the cookie sheet.  Since I don't like my cookies to be too poofy, this is what I did. 


See?  A nice flat, crispy, super buttery cookie!  So good.  They will stay softer in the middle for a couple of days as long as they are stored in a zip lock bag or airtight container.

Makes 3 Dozen


Peanut Butter Double Chocolate Chip Cookies

2 cups flour
1/2 cup cocoa powder
1 teaspoon baking soda
1 teaspoon salt
2 sticks butter, room temperature
3/4 cup sugar
3/4 cup light brown sugar, packed
1 egg
1 teaspoon vanilla extract
1 cup peanut butter chips
1 cup semi-sweet chocolate chips

In a medium bowl, combine the flour, cocoa powder, baking soda and salt; set aside. 

Using an electric mixer, cream the butter and sugars together until light and fluffy.  Beat in the egg, then add the vanilla.  Add the flour mixture and beat until well blended.  Stir in the peanut butter and chocolate chips by hand.  

Using a cookie scoop, drop the dough onto a cookie sheet and bake for 8-10 minutes.  Allow to cool for about 2 minutes before transferring to a wire rack to cool completely. 

You may also like:


Print Friendly and PDF

Wednesday, April 9, 2014

Ricotta Cake

Ricotta cake is a dessert that takes me straight back to my childhood.  I remember having this at my Italian grandmother's house after having one of those huge dinners - you know, there was always a huge pan of lasagna or bowl of pasta and salad, which was then immediately followed by a roast turkey or pork.  Always SO much food! 


I found this in my recipe binder and it had been given to me by my grandmother's best friend - I know my family will remember Angie!  Her and my grandmother were a riot.  Both the shortest little old Italian ladies, so cute... 

Ricotta cake is a staple in Italy and I've read that it's available at all supermarkets and bakeries.  One day I'll have to find that out for myself!   It's a super moist, almost pudding like cake.


You wouldn't know it to look at it, but the ricotta mixture is actually poured on top of the cake batter before baking.  Then, it sinks straight to the bottom.  Dust with confectioner's sugar and/or serve with berries or a light citrus glaze.  It really is heavenly!  

Serves 18

Ricotta Cake

1 box yellow cake mix and ingredients needed for cake
2 lbs ricotta cheese
3/4 cups sugar
3 eggs
3 teaspoons vanilla
confectioner's sugar for dusting

Preheat oven to 350 degrees.  Prepare cake mix according to directions and pour into a 9 x 13-inch pan (not greased).

Mix ricotta, sugar, eggs and vanilla and spread over top of the cake batter.  Bake for 20 minutes more than the directions on the box of cake mix.  Check when there is about 10 minutes left and tent with foil if the top is turning too brown.  

Let cool before dusting with confectioner's sugar and serving. 

You may also like:


Print Friendly and PDF

Monday, April 7, 2014

Peanut Butter Chocolate Chip Banana Bread

I make banana bread so often that it's fun to change it up a bit and try mixing in different flavors.  I always add chocolate chips, sometimes pecans, but this time I tried peanut butter.  Delicious!  


Not only is there peanut butter mixed into the batter, I also swirled it into the top.  So as you are eating it, you'll get a couple of bites of an even stronger peanut butter flavor.  And what goes better with chocolate than peanut butter?  


You'll notice a mixture of milk and vinegar in this recipe.  That is actually a substitution for buttermilk and I'll tell you what, I never buy buttermilk for baking since I discovered this.  You just have to let the mixture sit for about 5 minutes before adding it to your batter so I usually do that first before I start to mix everything together.  

Makes 2 loaves

Peanut Butter Chocolate Chip Banana Bread

1 cup vegetable oil
2 cups sugar
1/2 cup peanut butter, plus about 6 teaspoons for top of batter
4 cups flour
4 teaspoons baking powder
1 teaspoon baking soda
2/3 cup milk + 1/2 teaspoon white vinegar added 
6 ripe bananas, mashed with a fork
1 cup chocolate chips
1/2 cup peanut butter chips

Preheat oven to 350 degrees.  Using an electric mixer, combine the oil, sugar and 1/2 cup of peanut butter.  Combine flour, baking soda and baking powder and add to sugar mixture.  Add the milk/vinegar mixture and bananas and mix well.  Using a wooden spoon, stir in the chocolate and peanut butter chips.  

Pour into 2 well greased loaf pans (9 x 5-inch).  Drop remaining peanut butter by 1/2 teaspoons evenly over the top of the two batters (so 6 dollops per loaf).  Use a butter knife to swirl the peanut butter into the top of the batter.  Bake for 45-50 minutes. Start checking at 40 minutes and tent with foil if top is getting too brown.  Bread is done when a toothpick inserted into the center comes out mostly clean.  

Let cool for 5 minutes in the pans, then turn out on a wire wrack to finish cooling.  Store at room temperature for up to 3 days.  Bread can be kept in the freezer for up to 3 months (wrap in foil and place in freezer bag).

You may also like:


Print Friendly and PDF

Wednesday, March 26, 2014

My Favorite Banana Recipes

If you're like me, you always have a stash of frozen bananas in the freezer.  As they start to turn too brown to eat, I immediately throw what we have remaining into the freezer to use later for banana bread or muffins.  Here are my favorite ways to use those overripe bananas, just click the recipe to follow the link!


Happy banana baking!  I would love for you share some of your favorite banana recipes! 

Print Friendly and PDF

Monday, March 24, 2014

Butter Pecan Ice Cream

Homemade ice cream is just the BEST.  This buttery, rich ice cream is way better than store bought!  It's creamy and icy, just the way I like it.  Yes, there are a lot of steps and you need a candy thermometer, but it's oh so worth it.


The base is more like a custard because it contains eggs.  I always use half & half and whole milk in my ice cream.  You can substitute heavy cream for the whole milk in this recipe, but I prefer the lighter, icier consistency the whole milk gives it.  Plus, I'm a firm believer in just using what I have on hand - there is never a shortage of milk in my house and we pretty much always have half & half for various reasons.  

The instructions may seem a little daunting, but it's really quite simple - and for such a decadent dessert! 

Serves 8

Butter Pecan Ice Cream

1 tablespoon butter
1/2 cup chopped pecans
1 1/2 cups half & half
1 cup packed brown sugar
2 eggs, lightly beaten
1/2 cup whole milk
1 teaspoon vanilla extract

In a small skillet, toast pecans in butter for 5-6 minutes.  Cool completely.

In a heavy saucepan, using a candy thermometer, heat half & half to 175 degrees and stir in the brown sugar until dissolved.  Whisk a small amount of the hot cream mixture into the eggs to temper them.  Return all to the pan and whisk constantly.  Cook and stir over low heat until mixture reaches at least 160 degrees and coats the back of a metal spoon.

Remove from heat and cool quickly by placing pan in a bowl of ice water; stir for 2 minutes.  Stir in the whole milk and vanilla.  Press plastic wrap on the surface of the custard and refrigerate for several hours or overnight.

Stir in the toasted pecans right before pouring into ice cream maker.  Freeze in ice cream maker according to manufacturer's directions (usually about 20 minutes).  Mixture will still be more like soft serve at this point.  Spoon into a freezer container and freeze for at least 2 hours before serving.

(Source:  Adapted from Taste of Home) Print Friendly and PDF

Monday, March 17, 2014

Double Chocolate Chip Cookie Sandwiches

Happy St. Patrick's Day!

I've done a couple of posts with my Easy Vanilla Buttercream Frosting and since I had some mint frosting leftover from the Mint Oreo Brownies I made last week, I thought I could make these cookies a bit more festive and turn them into a little St. Patty's day dessert.  And who doesn't love a frosting filled cookie sandwich?  
   

The cookies themselves are delightful...you can absolutely omit the frosting in the middle and eat them as is.  Double chocolate!  Cocoa powder and chocolate chips mixed in.  Very buttery and when left really underdone (as I always do with my cookies), they are super gooey in the middle even after cooling.  


This dough is a bit thicker and doesn't really spread out all that much while cooking.  I used a cookie scoop to place the dough on the baking sheet, then pressed it down slightly with my fingers.  That way I got a thinner, flatter cookie for my sandwiches.  

Makes 3 dozen cookies or 18 sandwiches

Double Chocolate Chip Sandwich Cookies

2 cups flour
1/2 cup cocoa powder
1 teaspoon baking soda
1 teaspoon salt
2 sticks butter, room temperature
3/4 cup sugar
3/4 cup light brown sugar, packed
1 egg 
1 teaspoon vanilla extract
2 cups semi-sweet chocolate chips

For the mint buttercream filling
2 cups Easy Vanilla Buttercream Frosting, or store bought
1 - 1 1/2 teaspoons peppermint extract
5-6 drops green food coloring

Preheat oven to 350 degrees.  Combine flour, cocoa powder, baking soda and salt together; set aside.

Using an electric mixer, cream the butter and sugars together until light and fluffy.  Beat in the egg, then add the vanilla.  Add the flour mixture and beat until well blended.  Stir in the chocolate chips by hand.  

Using a cookie scoop, drop the dough onto a cookie sheet (or if using a spoon, it's about 2 tablespoons).

Bake for 8-10 minutes and allow to cool for about 2 minutes before transferring to a wire rack to cool completely.

While the cookies are cooling, add the peppermint extract to the buttercream frosting, starting with 1 teaspoon.  Add more if desired depending on the strength of your extract.  Add drops of food coloring until a light green color is reached.  Spread frosting on the bottom of one of the cookies, then top with another cookie.  Repeat until there are no more cookies remaining. 

Print Friendly and PDF

Wednesday, March 12, 2014

Oreo Brownies with Mint Buttercream Frosting

St. Patrick's Day is right around the corner!  And that means mint flavored everything everywhere.  If you've never tried the mint Oreos before, you are missing out.  Ah-mazing!  And because I couldn't help myself at the store and bought two packages, I thought I could use some of them in baking.


I adapted this recipe from Averie Cooks, but used brownie mix from a box and my own very Easy Vanilla Buttercream Frosting - and changed the flavor to mint!  You can also use store bought frosting and add the peppermint extract and food coloring to that.  


The Oreos are not only sprinkled on the top, but they are also mixed into the brownie batter before baking.  These are heavenly!  And so rich.  I cut them into 9 large brownies, but ended up eating only 1/2 of one at a time.  You could always make them more bite size by cutting into 16 pieces.

Yields 9 large brownies

Oreo Brownies with Mint Buttercream Frosting

1 box of brownie mix, plus ingredients to make (eggs, oil, water)
6 Mint Oreo cookies, crushed

For the mint buttercream frosting 
1 cup Easy Vanilla Buttercream Frosting, or store bought
1/2-1 teaspoon peppermint extract
5-6 drops green food coloring

For the topping
12 Mint Oreos, crushed

Grease an 8 x 8-inch pan with non-stick cooking spray.  Preheat oven and prepare brownies according to package directions, adding the 6 crushed Oreos to the batter.  Bake until just done or a little underdone (do not over bake - if you check with a toothpick, it shouldn't come out completely clean).  Let cool completely and make the frosting.

Add peppermint extract to the buttercream frosting, starting with 1/2 teaspoon.  Add more if desired depending on the strength of your extract.  Add drops of food coloring until a light green color is reached.  Spread frosting over cooled brownies.  Top with the rest of the crushed Oreos, slightly pressing them into the frosting.  Serve chilled and store in fridge, covered.

(Source:  Adapted from Averie Cooks)

Print Friendly and PDF

FREE eCookbook!

Search

My photo
I'm a super busy mom of 3 and a Beachbody coach. Follow along as I try to find a balance between eating good food and keeping my family healthy and happy! We eat mostly clean with a few fun treats thrown in every once in awhile. Thanks for stopping by!

What I'm Pinning...

I'm on Instagram!


Rivit Media
PublisherMunchkin Land Designs
 
Designed by Munchkin Land Designs • Copyright 2012 • All Rights Reserved