Showing posts with label cinnamon. Show all posts

Monday, May 5, 2014

Cinnamon Raisin Bagels

Making bagels at home seems hard, but I can assure you, it's really not!  I love having different varieties in my freezer at all times.  Sometimes I feel like I can't make them fast enough for my family!  


Cinnamon raisin has always been a family favorite.  Heck, we really like them all...here is my recipe for Everything Bagels - and Salt, too!  Same basic dough recipe.  You can create any flavor you like if you have this up your sleeve!  


The dough is mixed with raisins and swirled with cinnamon, which makes it look so pretty and tasty!  This is the dough after it's been resting for about an hour.  


Butter or cream cheese?  Toasted or not?  I actually like to eat these still warm from the oven with a slather of cream cheese.  Go ahead, try it.  Quite tasty freshly baked, right?  

Makes 8 bagels

Cinnamon Raisin Bagels

3 1/2 cups bread flour
1 1/4 cups warm water
1 1/2 tablespoons sugar
1 1/2 teaspoons salt
2 teaspoons instant yeast 
1 cup raisins
1 tablespoon cinnamon 

In the bowl of a stand mixer fitted with a dough hook, combine all the ingredients needed for the dough.  Mix on low until all the flour is incorporated, then turn it up to medium speed and mix for about 5 minutes.  Once you have a pretty smooth dough (the dough should have pulled away from the sides and bowl should be pretty clean), sprinkle the raisins and cinnamon over the dough.  Use your hands to knead and mix throughout the dough, for about 2-3 minutes.  Turn the dough out and spray the same bowl with non-stick cooking spray.  Return the dough to the bowl, giving it a turn or two to coat in oil.  Let rest, covered with a clean dish towel for an hour.  

Turn the dough out onto a lightly floured surface and cut into 8 equal pieces.  Roll into a ball and use a finger to press and stretch a small hole through.  Allow them to rest for about 10 minutes.  Meanwhile, put a large pot of water on to boil.  Spray an 11 x 18-inch baking sheet with non-stick cooking spray and preheat oven to 425 degrees. 

Place the bagels into the boiling water (2-3 at a time depending on how big your pot is) for 45 seconds to a minute on each side.  Remove and place on prepared baking sheet.  Repeat until all the bagels have been boiled.  

Bake for 20 minutes, until the tops are golden.  Enjoy immediately or store in an airtight container for up to 5 days.  Or freeze for up to 6 months.  

You may also like:


Print Friendly and PDF

Wednesday, March 26, 2014

My Favorite Banana Recipes

If you're like me, you always have a stash of frozen bananas in the freezer.  As they start to turn too brown to eat, I immediately throw what we have remaining into the freezer to use later for banana bread or muffins.  Here are my favorite ways to use those overripe bananas, just click the recipe to follow the link!


Happy banana baking!  I would love for you share some of your favorite banana recipes! 

Print Friendly and PDF

Wednesday, February 26, 2014

Homemade Cinnamon Applesauce

Making homemade applesauce seems a bit daunting, right?  Wrong!  So easy!  And it will make your house smell absolutely heavenly. 


This recipe is adapted from the Pioneer Woman and I basically halved her recipe (it can be very easily doubled).  My husband loves Red Delicious apples, so that's what I usually buy and that's what I used.  We had 3 sitting around just waiting to go bad so that's all that I wrote the recipe for.  


The hardest (and most tedious) part is peeling and slicing the apples.  Then, everything goes into one pot, it stews for about 25 minutes and gets mashed up (or pureed).  Nothing to it!  


I used my potato masher, but at that point, the apples were so soft that a fork would have done the trick as well.  If you want a smoother consistency, just throw the cooked apples into your food processor and puree until you get the consistency you like.  Did I mention that while on the stove your house will smell so good??  Another added benefit to making this!

Serves 6

Homemade Cinnamon Applesauce

3 medium apples, peeled, cored and sliced
1/2 cup water
Juice of 1/2 lemon
1/4 cup brown sugar, packed
1/2 teaspoon cinnamon

Combine all the ingredients in a large pot and cook over medium heat for about 25 minutes.  Use a potato masher or fork for a chunky consistency or a food processor to puree the applesauce.

Store in the fridge in an airtight container.

(Source:  Adapted from The Pioneer Woman)

Print Friendly and PDF

Wednesday, January 8, 2014

Honey Bun Cake

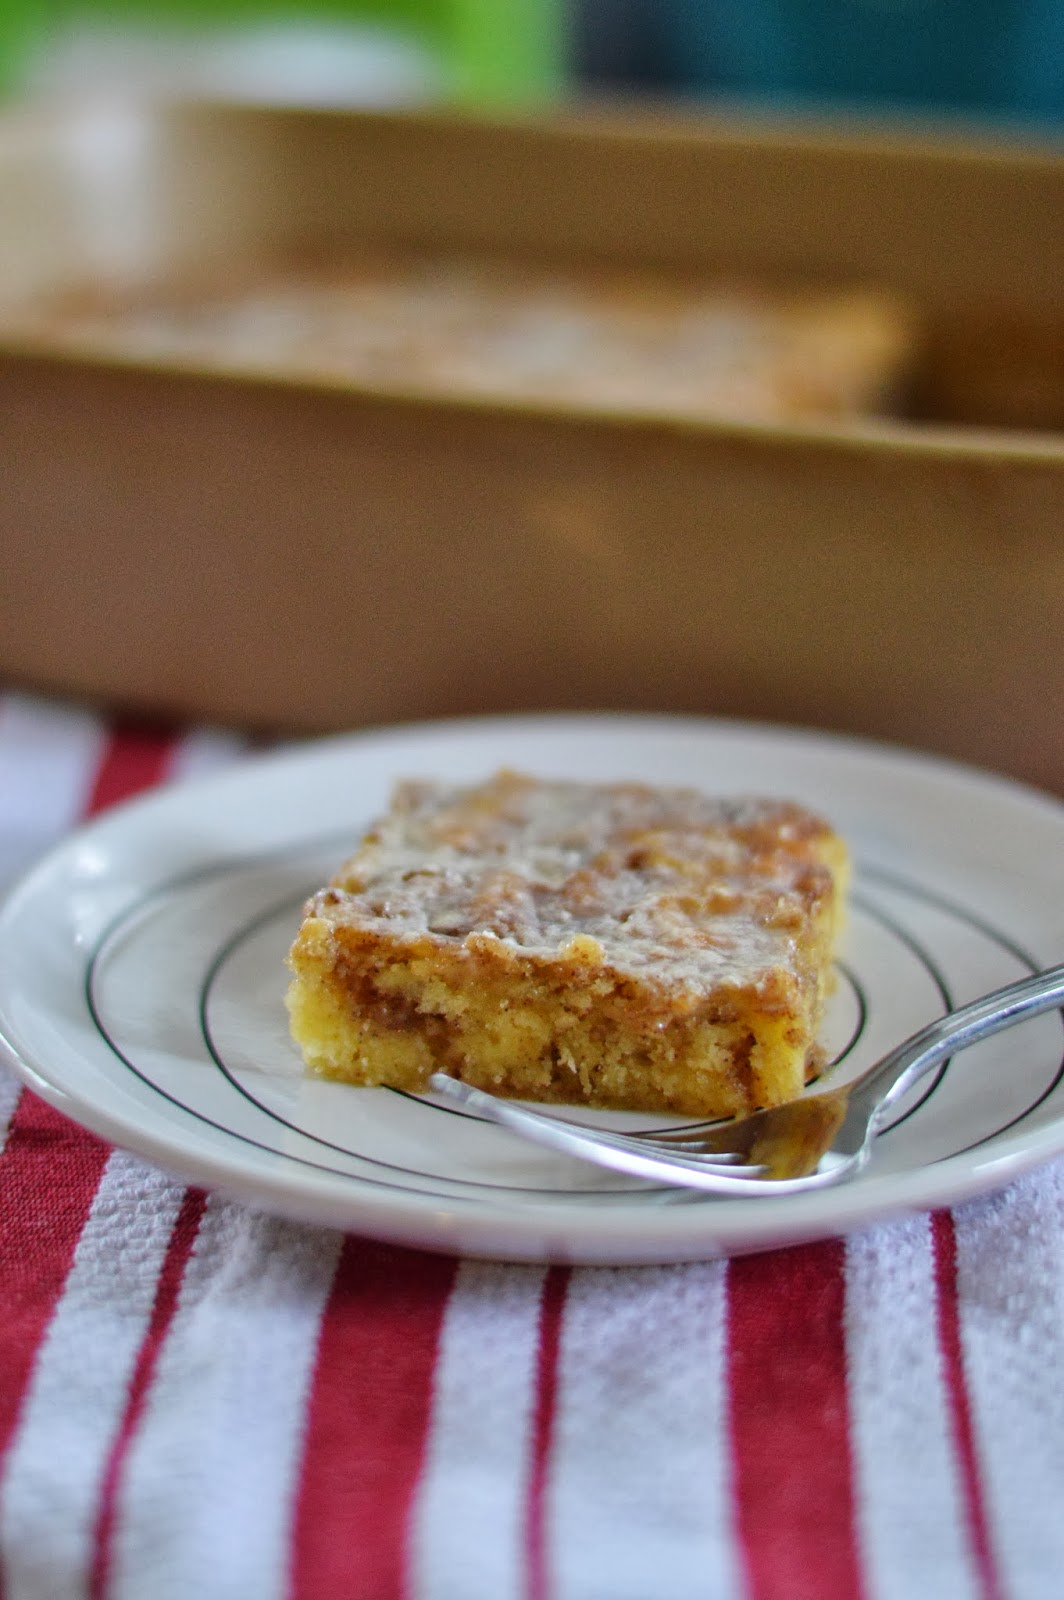
This really does have the flavor of those Honey Bun cakes you can buy in the grocery store - only 1000 times better!  It's an incredibly sweet cake, which topped with a powdered sugar glaze makes it that much sweeter.  Great with a huge glass of milk or cup of coffee (yes, I eat cake for breakfast!). 


Not only it is super sweet, it's super moist.  I recommend storing it in the fridge, which will firm it up a bit.  You can also use sour cream in place of the buttermilk.


I made the glaze thin and sort of runny so it seeped into the cake more.  Use less milk in yours if you want it a bit thicker.  Can you tell my family enjoyed it?  

Serves 12

Honey Bun Cake

1 box of yellow cake mix
2/3 cup oil
4 eggs
1 cup buttermilk
1 cup packed brown sugar
3 teaspoons ground cinnamon

For the glaze
1 1/2 cups powdered sugar
3 tablespoons milk
2 tablespoons butter, softened
1 teaspoon vanilla 

Preheat oven to 350 degrees.  Grease a 9 x 13-inch pan with non-stick cooking spray.  In a large bowl, beat the cake mix, oil, eggs and buttermilk with an electric mixer for about 2 minutes.  Pour the batter into the pan. 

In a small bowl, combine the brown sugar and cinnamon and sprinkle over top of the cake batter.  Use a butter knife to swirl the brown sugar mixture throughout the cake.  Bake for 45-50 minutes, until golden.  Prick the surface of the cake with a fork several times.  

To make the glaze, whisk all of the ingredients until smooth.  Pour glaze over warm cake and allow it to cool completely.  Store covered in the fridge.  

(Source:  Adapted from Betty Crocker)

Print Friendly and PDF

Thursday, December 19, 2013

Apple Cake with Caramel Glaze

I love a cake with fresh apples!  And the brown sugar, caramel glaze puts this cake over the top.  Pecans are optional, but they go so well with the cinnamon and apple that unless you are totally against (or allergic to) nuts, I would absolutely use them. 


I used a spring form pan because I wanted the glaze to drip down the sides.  If you use a square or round cake pan, then your glaze will just be on top - and just as good!  


The cake is moist and sweet and just so good!  I think it's best served at room temperature, but I did end up keeping it in the fridge.  

Serves 8-10

Apple Cake with Caramel Glaze

2 eggs
1/2 cup vegetable oil
1 teaspoon vanilla
1 1/2 cups flour
1 cup sugar
1/2 teaspoon salt
1/2 teaspoon cinnamon
1 1/2 cups peeled and chopped apples
1/2 cup chopped pecans (optional)

For the glaze
1/2 cup packed brown sugar
3 tablespoons butter
1 tablespoon half & half
1/2 teaspoon vanilla

Preheat the oven to 350 degrees.  Grease an 8-pan (round or square) or a spring form pan.  In the bowl of a stand mixer, beat the eggs until they are light in color and foamy.  Add the oil and vanilla and mix well.

In a smaller, separate bowl, combine the flour, sugar, salt and cinnamon.  Add the flour mixture to the wet mixture and mix until just combined.  Stir the apples and pecans in by hand.  Pour the batter in the prepared pan and bake for 40-45 minutes until a toothpick inserted into the center comes out clean.  While the cake is still hot, prepare the glaze.

For the glaze: Combine all of the ingredients into a saucepan.  Cook over medium heat, stirring often until the mixture comes to a gentle boil.  Cook for 3-5 minutes.

Spoon the hot glaze over the still warm cake.  Let the glazed cake cool completely before serving.

(Source:  Adapted from Lick the Bowl Good)

Print Friendly and PDF

Friday, October 18, 2013

Caramel Apple Bundt Cake

I love baking with apples in the fall!  I'm on Pinterest (obviously!) and there is just so much inspiration out there.  This recipe comes from the blog, Sugar 'n Spice Gals and it is delicious!  I have a smaller Bundt pan, just a bit skinnier than a normal one, so I ended up with extra batter and an adorable mini version of this cake.


Cute right?  This would be such a nice treat to bring to a Holiday dinner.  Just bring the caramel sauce separate and drizzle on right before serving.  I think you're family would be pretty impressed!


The caramel sauce, as the cake sits, seeps into it and keeps it so moist.  My thought was that I was going to walk the mini one over to my neighbors house, but by the time I allowed my family to cut into one (you know, after the pictures were taken) it was gone in a minute!  Baked goods do not last long in our house... 

Makes 1 large bundt cake (or a couple smaller cakes)

Caramel Apple Bundt Cake

1 1/2 cups vegetable oil
1 1/2 cups sugar
1/2 cup brown sugar
3 eggs
2 teaspoons vanilla extract 
3 cups flour
2 teaspoons cinnamon
1 teaspoon baking soda
1/2 teaspoon nutmeg
1/2 teaspoon salt
apples, peeled and diced
1 cup chopped pecans (optional)

For the glaze 
1/2 cup brown sugar
1/3 cup half & half
1/4 cup butter
dash of salt
1 cup confectioner's sugar

Preheat oven to 325 degrees.  Spray and flour bundt pan(s).  In the bowl of a stand mixer fitted with the paddle attachment, combine the oil, sugars, eggs and vanilla extract.  Mix until everything is incorporated.  In a smaller bowl, combine the flour, cinnamon, baking soda, nutmeg and salt.  Add the dry ingredients to the wet mixture and give it a stir.  Fold in the apples and pecans (if using).

Pour batter into the prepared pan and bake for 1 1/2 hours.  If using 2 smaller pans, you will need to adjust the time - the mini one took about 45 minutes and my thinner bundt pan took 1 hour and 15 minutes.  When your toothpick comes out clean, it's done.  

Let cool for 10 minutes, then gently slide a butter knife down the sides of the pan to loosen the cake.  Flip upside down onto plate or cake stand.  

Make the caramel glaze by combining the brown sugar, half & half, butter and salt in a medium saucepan; heat over medium heat until everything is melted and combined.  Let cool to room temperature then whisk in confectioner's sugar.  Drizzle over the top of the cake.  Cut into slices and serve room temperature.  

(Source:  adapted from Sugar 'n Spice Gals)
  
Print Friendly and PDF

Thursday, October 3, 2013

Pumpkin Apple Streusel Muffins

'Tis the season for pumpkin recipes!!  I have so much canned pumpkin at my house it's not even funny.  Pinterest sure does inspire!  I also had a can of apple pie filling so thought I mix the two flavors together - these are amazing.  And it makes a ton of muffins, about 18 to 24.  


I added a streusel topping for a bit of added sweetness and crunch.  It's just butter, cinnamon, sugar and flour mixed together and sprinkled over the top before baking. 

Makes 18-24 muffins

Pumpkin Apple Streusel Muffins

2 eggs, lightly beaten
1 cup canned pumpkin puree
1 can of apple pie filling
2 1/2 cups flour
1 cup sugar
1 tablespoon pumpkin pie spice
1 teaspoon baking soda
1/2 teaspoon salt

For the streusel topping
2 tablespoons flour
1/4 cup sugar
1/2 teaspoon ground cinnamon
4 teaspoons butter

Preheat oven to 350 degrees and line 2 12-cup muffin tins with liners (or spray with non-stick cooking spray).  In a large bowl, mix the eggs, pumpkin and apple pie filling until combined.  In a smaller, separate bowl, mix the flour, sugar, pumpkin pie spice, baking soda and salt.  Add to the wet ingredients and stir just until everything is combined.

Using an ice cream scoop, fill the cup cake liners about 3/4 of the way full.  In a small bowl, combine the ingredients for the streusel topping.  Using a fork or knife, keep cutting through the butter until the mixture resembles coarse crumbs.  Distribute evenly over the muffin batter.

Bake for 30-35 minutes until a toothpick inserted into the center of a muffin comes out clean.

(Source:  Adapted from allrecipes.com)

  Print Friendly and PDF

Saturday, September 7, 2013

Cinnamon Raisin Bread

I've been on a making bread kick lately.  We buy so much bread at the store - white bread, wheat bread, French bread, rolls, English muffins, the list is endless!  In a effort to tighten our budget at bit, I've decided to make instead of buy (as much as I can anyway).  Cinnamon raisin toast is one of my absolute favorite breakfast items, but it can be pretty pricey buying a loaf in the store.  I was so excited to find this recipe from Super Glue Mom on Pinterest that I immediately had to try it out.  It's easy and makes three whole loaves!! 


It makes a lot of dough - like I said, enough for three loaves so you'll need a pretty big bowl to let it rise.  It will double in size in about 1 1/2 hours. 


You roll the entire dough out at once and slather on a mixture of cinnamon and sugar.  Roll it up and slice into three loaves.  Into the loaf pans they go and to rise for another hour. 


And this is the heavenly (I'm pretty sure I used that word more than once while we were eating it this morning) finished product.  OMG.  Believe me, you will be so glad you have those other two loaves to fall back on.  We ate nearly 1/2 a loaf for breakfast and the other two are in the freezer.  Probably not long before they make their way out of there!  


 Makes 3 loaves

Cinnamon Raisin Bread

1 1/2 cups milk, luke-warm (heat in microwave or stovetop)
1 cup warm water
5 teaspoons yeast
3 eggs
1/2 cup white sugar
1 teaspoon salt
1 stick of butter, room temperature
1 cup raisins
9 cups flour and more for dusting 

For the filling
2 tablespoons milk
1 cup sugar
3 tablespoons ground cinnamon

In the bowl of a stand mixer, dissolve the yeast in the warm water until frothy, about 10 minutes.  Add in eggs, sugar, butter, salt and raisins and mix.  Add the room temperature/ warm milk and slowly mix to combine.  Gradually add flour to make dough (start with 8 cups and add in the last cup as needed).  You may need to add the last cup by hand if your bowl starts to overflow like mine did.   

Turn out dough onto a lightly floured surface and knead for a few minutes until smooth, adding in the last cup of flour if necessary.  Spray a large bowl with non-stick cooking spray and place dough in, turning it to coat all sides.  Cover with a clean dishtowel and set in a warm place.  Let rise for 1 1/2 hours until doubled in size. 

Once again, turn out dough onto a lightly floured surface and roll out to a large rectangle approximately 1/2 inch thick (mine ended up being about 27 inches long).  Moisten the dough with the milk and use your hands to rub all over dough.  Mix the sugar and cinnamon together and sprinkle evenly over the dough.  Roll up tightly from the long end - it should be about 3 inches in diameter.  

Cut into thirds,  pinching dough together at the seams.  Place loaves,seams side down, into 3 greased loaf pans and let rise, uncovered for another hour.  

Bake at 350 degrees for 45 minutes or until loaves are lightly browned and sound hollow when tapped.  Remove from oven and let cool on racks.  After about 20 minutes, turn bread out from pans.  Allow bread to cool before slicing.  Serve toasted with butter or use for French toast!  To freeze, wrap in foil and place in freezer bags.

(Source:  Adapted from Super Glue Mom)
  
Print Friendly and PDF

Tuesday, January 29, 2013

Cinnamon Roll French Toast Bake

I feel like I've been slacking, but I haven't been baking much lately.  Well, strike that...of course I've been baking, just not anything new that I've wanted to share with y'all.  Over the past couple of weeks we've had Chocolate Cherry Cake (it was my birthday after all!) and my Chocolate Chip Blondies.  So PLENTY of baking being done, but you've seen all those!  

I did make something amazing for breakfast over the weekend that I absolutely had to share.  It's a french toast bake with, wait for it...canned cinnamon rolls!  How good are those on their own?!  Well, if those are good, then this is extreme.  Extremely tasty and extremely sweet that is.  My family flipped out for this (we may have eaten the whole thing that morning - there are 4 of us - this serves 12...yikes.  But you can't really go by those serving suggestions, right?). 


You'll start with 2 cans of the cinnamon rolls, cutting each roll into 8 pieces and placing in a greased baking dish.  Then a mixture of eggs, half and half, vanilla and cinnamon are poured all over the top.  Then if you can even stand it, maple syrup goes on top of THAT! 


Bake for about 25 minutes and the cinnamon rolls get all puffed up and golden.  Let cool for 15 minutes. 


 In the meantime, you'll take the icing that comes with the cinnamon rolls, melt it in the microwave and pour all over the top (seriously, drooling yet?).  If you want to get your kiddos ready for day by way of a sugar high, then this is your breakfast!  You can serve it with a little extra drizzle of maple syrup, too.  

 Serves 12

Cinnamon Roll French Toast Bake 

2 cans (12 oz) cinnamon rolls
5 eggs
1/2 cup half & half
2 teaspoons cinnamon
2 teaspoons vanilla 
1/2 cup maple syrup, plus more for serving
Icing from the cinnamon rolls 

Preheat oven to 375 degrees.  Grease a 13x9 or large oval baking dish with non-stick cooking spray.  Open the cans of cinnamon rolls and separate the rolls.  Cut each into 8 pieces and place in baking dish.  In a medium bowl, combine the eggs, half & half, cinnamon and vanilla.  Pour over top of the cinnamon rolls and then drizzle the 1/2 cup of maple syrup on top of that.  

Bake for 25-28 minutes until golden brown.  Cool for 15 minutes.  Remove the covers from the icing and microwave at 50% for 10-15 seconds or until thin enough to drizzle over the french toast bake.  Serve with maple syrup if desired.

(Source:  Adapted from Pillsbury.com)

Print Friendly and PDF

Wednesday, January 9, 2013

Apple and Zucchini Muffins

I said this in my last post, but my kids are becoming increasingly picky.  Luckily, they like fruit and eat bananas like they're going out of style, but other than that, I'm having a hard time getting them to eat more than just bread!  I ask my 3-year old what she wants for breakfast (or lunch or dinner for that matter) and her answer is always an enthusiastic, "Toast!".  Sometimes with jelly (at least she's getting some fruit?) and sometimes with peanut butter (a little protein?), but that girl loves her toast.

I make banana muffins or bread regularly because I always have a stash of bananas in my freezer.  I thought I would try something a little different and help my kids get some veggies at the same time.  I'm not saying that these are healthy, still sugar and oil and all that, but it makes me feel a little good about myself when I see my two little ones gobble these up.


Love these little muffin/cupcake liners I got for Christmas!


This makes a lot of batter.  In fact the original recipe calls for 3 loaf pans.  I only have 2 12-cup muffin pans so I did 24 muffins and then put the rest into a loaf pan (it didn't fill it up all the way, so it was kind of a short loaf).  


Makes 30 muffins or 3 loaves

Apple Zucchini Muffins

5 eggs
1 1/2 cups vegetable oil 
2 cups sugar
1 cup packed brown sugar
1 tablespoon vanilla extract
4 cups flour
1 tablespoon baking soda
1 1/2 teaspoons ground cinnamon
1/2 teaspoon nutmeg
1/4 teaspoon salt
2 cups shredded unpeeled zucchini
1 cup peeled finely diced apples (or you can shred them)
1 cup chopped pecans

Preheat oven to 350 degrees and fill two 12-cup and one 6-cup muffin tin with cupcake liners (or grease three 8x4 loaf pans).  Add eggs to the bowl of a stand mixer fitted with the paddle attachment and beat.  Add oil, sugars and vanilla.  Mix the dry ingredients together and add; mix well.  Add zucchini, apples and pecans and mix again.  Using an ice cream scoop, spoon batter 2/3 of the way full into the lined muffin tins.  Bake for 25-30 minutes until a toothpick inserted into the center of a muffin comes out clean. 

(Source:  Adapted from Taste of Home)

Print Friendly and PDF

FREE eCookbook!

Search

My photo
I'm a super busy mom of 3 and a Beachbody coach. Follow along as I try to find a balance between eating good food and keeping my family healthy and happy! We eat mostly clean with a few fun treats thrown in every once in awhile. Thanks for stopping by!

What I'm Pinning...

I'm on Instagram!


Rivit Media
PublisherMunchkin Land Designs
 
Designed by Munchkin Land Designs • Copyright 2012 • All Rights Reserved