Showing posts with label vanilla. Show all posts

Wednesday, April 9, 2014

Ricotta Cake

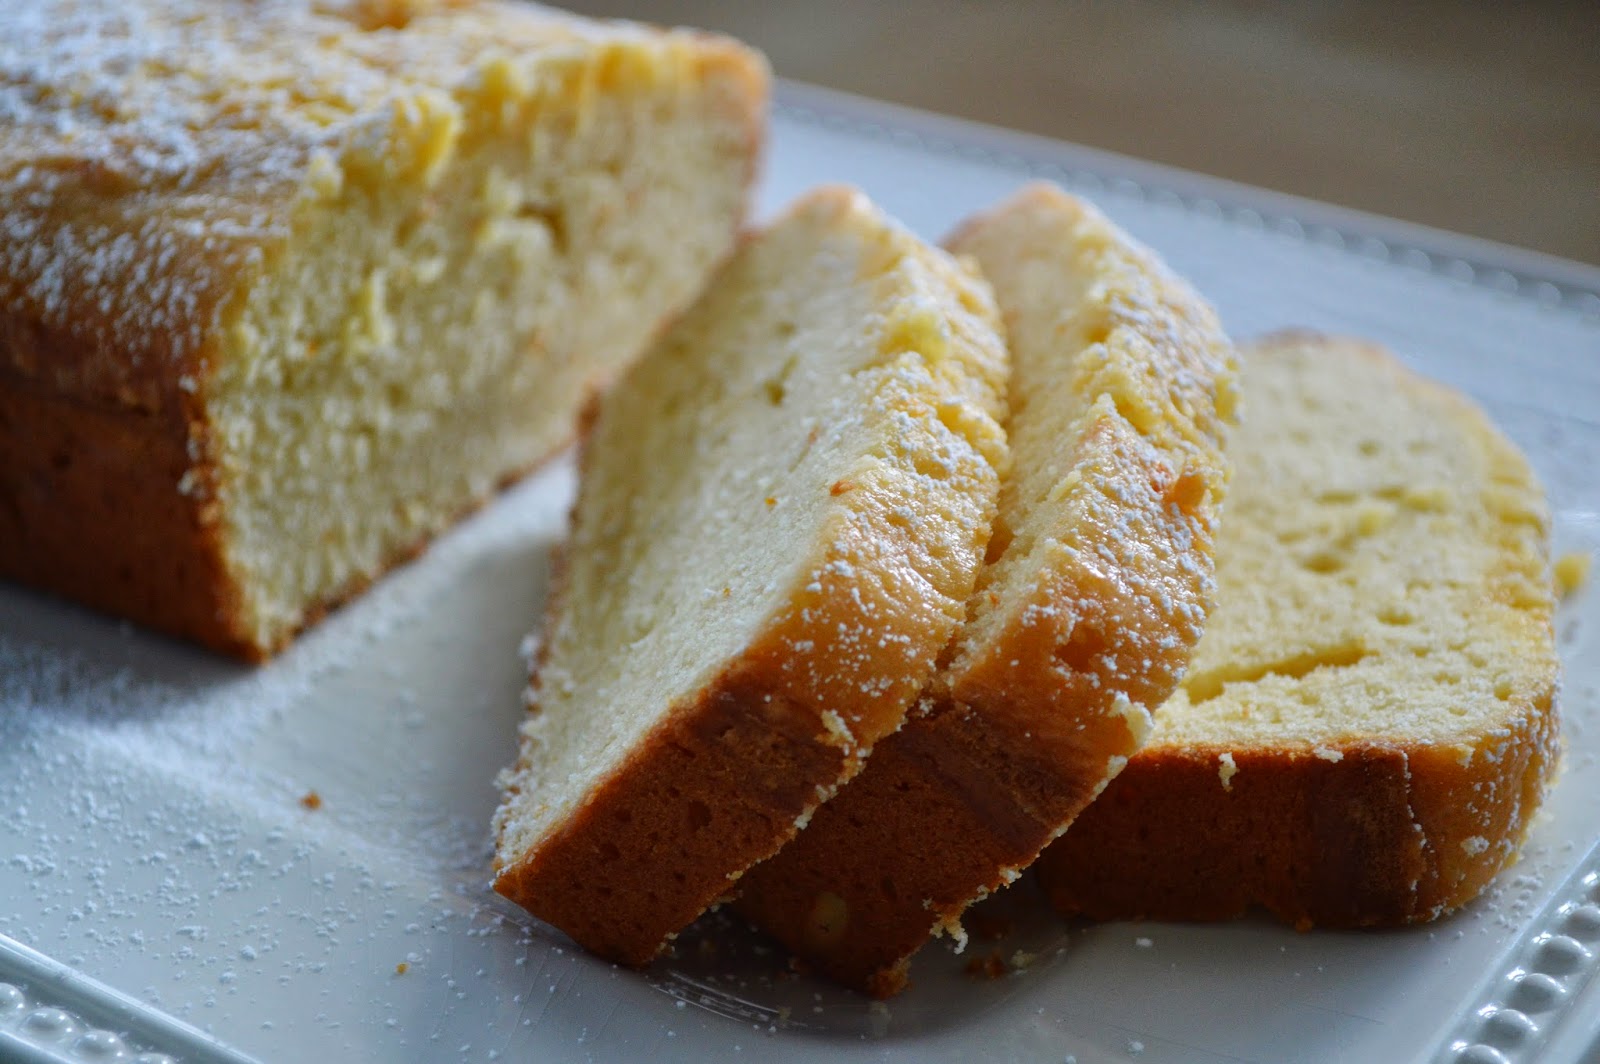
Ricotta cake is a dessert that takes me straight back to my childhood.  I remember having this at my Italian grandmother's house after having one of those huge dinners - you know, there was always a huge pan of lasagna or bowl of pasta and salad, which was then immediately followed by a roast turkey or pork.  Always SO much food! 


I found this in my recipe binder and it had been given to me by my grandmother's best friend - I know my family will remember Angie!  Her and my grandmother were a riot.  Both the shortest little old Italian ladies, so cute... 

Ricotta cake is a staple in Italy and I've read that it's available at all supermarkets and bakeries.  One day I'll have to find that out for myself!   It's a super moist, almost pudding like cake.


You wouldn't know it to look at it, but the ricotta mixture is actually poured on top of the cake batter before baking.  Then, it sinks straight to the bottom.  Dust with confectioner's sugar and/or serve with berries or a light citrus glaze.  It really is heavenly!  

Serves 18

Ricotta Cake

1 box yellow cake mix and ingredients needed for cake
2 lbs ricotta cheese
3/4 cups sugar
3 eggs
3 teaspoons vanilla
confectioner's sugar for dusting

Preheat oven to 350 degrees.  Prepare cake mix according to directions and pour into a 9 x 13-inch pan (not greased).

Mix ricotta, sugar, eggs and vanilla and spread over top of the cake batter.  Bake for 20 minutes more than the directions on the box of cake mix.  Check when there is about 10 minutes left and tent with foil if the top is turning too brown.  

Let cool before dusting with confectioner's sugar and serving. 

You may also like:


Print Friendly and PDF

Friday, March 21, 2014

Clementine Quick Bread

My family and I have been addicted to clementines lately and we always have them around for a quick snack.  But sometimes, after opening a new bag, I wonder why they give you so many?  Even if your family doesn't have a hard time finishing them all, you may be looking for a fun new way to use them.  And I have your answer!  


A simple and sweet light bread that is great for breakfast with a little butter (or plain) or as a after school snack.  My kiddos loved it!  I make banana bread so often that I think they were happy for the change.  


I love the bright orange flecks of zest throughout.  And the glaze makes the bread just a touch sweeter and keeps it very moist.  Sprinkle with a dusting of confectioner's sugar and your family or guests are sure to be wowed!  

 Makes 1 loaf

Clementine Quick Bread

8 clementines (zest from 4 and juice from all 8)
3/4 cup half & half
1 tablespoon vanilla extract
2 cups flour
1/4 teaspoon baking powder
1/4 teaspoon baking soda
1/4 teaspoon salt
1 stick butter, room temperature
1 cup sugar
2 eggs
1/4 cup confectioner's sugar

Preheat oven to 350 degrees.  Grease a 5 x 9-inch loaf pan with non-stick cooking spray.  Zest 4 clementines to yield 1 tablespoon zest.  Juice the zested and unzested (8 total) clementines to yield 3/4 cup juice - separate into 1/4 cup and 1/2 cup measurements.

Combine 1/4 cup clementine juice, half & half and vanilla extract in a small bowl, set aside.  Combine flour, baking powder, baking soda and salt in a another bowl and set aside.

Beat zest, butter and sugar with a mixer until combined, about 4 minutes.  Add eggs, one at a time, beating after each addition.  Beat in cream mixture, followed by flour mixture.

Pour batter into prepared pan and bake 50-60 minutes until a toothpick inserted in the center comes out clean.  Check at 40 minutes and tent with foil if top is browning too quickly.

Make the glaze by combining the remaining 1/2 cup of juice with the confectioner's sugar.  Remove pan from oven, poke holes in the top with a skewer and apply half the glaze.  Let cool for 15 minutes, then invert pan onto a wire cooling wrack, top side up.  Brush remaining glaze on top.

Store wrapped at room temperature overnight or in the fridge for up to 5 days.

(Source:  Adapted from Martha Stewart)

Print Friendly and PDF

Wednesday, March 12, 2014

Oreo Brownies with Mint Buttercream Frosting

St. Patrick's Day is right around the corner!  And that means mint flavored everything everywhere.  If you've never tried the mint Oreos before, you are missing out.  Ah-mazing!  And because I couldn't help myself at the store and bought two packages, I thought I could use some of them in baking.


I adapted this recipe from Averie Cooks, but used brownie mix from a box and my own very Easy Vanilla Buttercream Frosting - and changed the flavor to mint!  You can also use store bought frosting and add the peppermint extract and food coloring to that.  


The Oreos are not only sprinkled on the top, but they are also mixed into the brownie batter before baking.  These are heavenly!  And so rich.  I cut them into 9 large brownies, but ended up eating only 1/2 of one at a time.  You could always make them more bite size by cutting into 16 pieces.

Yields 9 large brownies

Oreo Brownies with Mint Buttercream Frosting

1 box of brownie mix, plus ingredients to make (eggs, oil, water)
6 Mint Oreo cookies, crushed

For the mint buttercream frosting 
1 cup Easy Vanilla Buttercream Frosting, or store bought
1/2-1 teaspoon peppermint extract
5-6 drops green food coloring

For the topping
12 Mint Oreos, crushed

Grease an 8 x 8-inch pan with non-stick cooking spray.  Preheat oven and prepare brownies according to package directions, adding the 6 crushed Oreos to the batter.  Bake until just done or a little underdone (do not over bake - if you check with a toothpick, it shouldn't come out completely clean).  Let cool completely and make the frosting.

Add peppermint extract to the buttercream frosting, starting with 1/2 teaspoon.  Add more if desired depending on the strength of your extract.  Add drops of food coloring until a light green color is reached.  Spread frosting over cooled brownies.  Top with the rest of the crushed Oreos, slightly pressing them into the frosting.  Serve chilled and store in fridge, covered.

(Source:  Adapted from Averie Cooks)

Print Friendly and PDF

Monday, March 10, 2014

Easy Vanilla Buttercream Frosting

 So easy and fast, you'll use this as your go-to recipe from now on.  This is a basic vanilla buttercream and it is amazing.  There's no need to buy store bought anymore!  


If you have this recipe up your sleeve, then you can very easily add to it to make different flavors.  To make chocolate, just add 4 ounces of melted and cooled semi-sweet chocolate when you add the vanilla.  


So light and fluffy!  Spreads easily and you can control the consistency by adding more or less cream (or none at all!).  I should point out that I have used everything from whipping cream to milk (depending on what was in my fridge) and got pretty consistent results every time.  

Yields 2 cups

Easy Vanilla Buttercream Frosting

3 cups confectioner's sugar
1 cup butter, room temperature
1 teaspoon vanilla extract
1-2 tablespoons cream or milk

In the bowl of a stand mixer fitted with a whisk, beat the butter and sugar on low until combined.  Increase speed to medium and beat for about 3 minutes.  Add the vanilla and 1 tablespoon cream and mix for 1 more minute.  Add more cream if desired.

Use immediately or store covered in fridge for up to 3 days.  Bring to room temperature before using.  

Print Friendly and PDF

Monday, March 3, 2014

Brownies with the BEST Peanut Butter Frosting

So. Unbelievably. Good.  The brownies are straight goodness from a box and the icing is beater licking, bowl licking fantastic.  So not only good, but really, barely a recipe...so easy! 


If you have a favorite from-scratch brownie recipe, feel free to use that in place of the box.  I happen to love brownie mixes - that consistently fudgy result EVERY time.  
  

Look how creamy that icing is.  I could not stop eating it...off the beaters, the bowl, the spatula, the knife when I cut the brownies.  Ridiculously peanut buttery good.


This is now my go-to peanut butter icing.  Cupcakes and cakes, I'll even make some to swirl into ice cream.  I'm certain that you'll go back to it again and again too.  It's incredibly simple enough!

Makes 16 Brownies

Brownies with Peanut Butter Frosting
1 box of fudge brownie mix
Oil, eggs, water to make brownies- according to package directions
For the frosting
1 cup confectioner's sugar
3/4 cup creamy peanut butter
1/4 butter, room temperature
1 teaspoon vanilla extract
3-4 teaspoons milk
Make brownies according to package directions.  Cool completely.  Make the icing by combining the confectioner's sugar, peanut butter, butter and vanilla in a medium bowl and mixing with a hand mixer.  Add the milk a teaspoon at a time until it becomes light and fluffy and spreadable. 

Spread icing over entire pan of cooled brownies.  Cut into 16 small squares or 9 larger squares.
Print Friendly and PDF

Wednesday, February 19, 2014

Sugar Cookies with Super Easy Glaze

This is an amazing sugar cookie recipe - you can roll them thin and they still turn out soft (just the way I like them!) or use a cookie scoop and make regular cookies.  I made these for Valentine's Day, so I used my heart shape cookie cutters and lots of pink, red and white sprinkles.  Too, too cute!  


The glaze is the easiest icing you will ever make in your life.  I found the best thing to do was to just dip the cookies into the bowl of the glaze.  Then, add sprinkles!  You can even add a couple of drops of food coloring to the glaze to make different colors.    

Makes 4 dozen

Sugar Cookies with Super Easy Glaze

3 cups all-purpose flour
1/2 teaspoon baking powder
1/2 teaspoon salt
1 cup butter, room temperature
1 1/3 cups sugar
2 eggs
2 teaspoons vanilla extract
sprinkles

For the glaze:
1 cup confectioner's sugar
2-4 teaspoons milk

In a medium bowl, combine flour, baking soda and salt.  Set aside.

In the bowl of a stand mixer, combine butter and sugar and beat until light and fluffy, about 3 minutes.  Add the eggs, one at a time, beating well after each addition.  Add vanilla.  Then, add the flour mixture and beat until just combined.

Turn dough out onto a piece of plastic wrap and shape into a disc.  Refrigerate the dough for at least an hour.

When ready to bake, preheat oven to 350 degrees.

Generously flour your work surface, remove dough from plastic wrap and place on flour.  Flour rolling pin and roll dough to about 1/4-inch thick.*  Cut to desired shape with cookie cutters and place them on a cookie sheet.  Re-roll leftover scrapes and refrigerate any unused dough until ready to bake again.

Bake for 9-11 minutes until pale golden, let cool for 2 minutes, then transfer to a wire cooling rack (place a piece of foil under the rack for easy clean up later).  Let cool completely before frosting.  Repeat steps with the rest of the remaining dough.

To make the glaze, combine the confectioner's sugar and milk (start with 2 teaspoons).  Add more milk or sugar to make the glaze as thick or thin as desired.  Dip one side of the cooled cookies in the glaze and place back on rack (where the foil comes in handy!).  Immediately top with sprinkles.  Allow the glaze and sprinkles to set - the glaze will harden enough to stack the cookies when storing.

*Notes:  the original recipe called for the dough to be rolled out between two sheets of wax paper.  While this worked, after cutting out the shapes with the cookie cutters, the dough was sticking to the wax paper.  I found that working on a floured surface was much easier.

(Source:  Adapted from Just a Taste)

Print Friendly and PDF

Saturday, December 21, 2013

Peppermint Fudge

My mom makes the best mint fudge.  But, when I asked her for the recipe, she told me she actually uses one bag of mint chocolate chips (not the green ones!) and one bag of semi-sweet chocolate chips.  And I could not find mint chocolate chips anywhere!  So, I made do with peppermint extract.  Still yummy!  I've made it twice this month... 


The crushed candy canes are optional - I just wanted to make it look festive for the Holidays.  Red and Green sprinkles would be cute, too.


The first time I made it, I only used one bag of chocolate chips and the fudge was too thin for my liking.  The next time, I doubled everything and got these monster bites of fudge (which is exactly what I wanted!).  The recipe can very easily be cut in half.  

Serves 18

 Peppermint Fudge

5 cups chocolate chips
2 (14 oz) cans sweetened condensed milk
4 tablespoons butter, softened
1/2 cup milk
4 teaspoons peppermint extract
2 teaspoons vanilla extract
1 or 2 candy canes, crushed (optional)

Line a 9 x 9-inch square baking dish with aluminum foil and spray with non-stick cooking spray.  Combine chocolate chips and sweetened condensed milk in a saucepan over medium heat.  Cook stirring frequently, until the chocolate is melted.  Remove from heat and immediately stir milk and butter into the chocolate mixture.  Stir in peppermint and vanilla extract.

Pour into the prepared baking dish and refrigerate until set, about 2+ hours. Gently pull up on the sides of the foil to release it from the pan.  Cut the fudge into small squares.  Store covered in the fridge.

*Tip - if yours doesn't really "set" you can store this in the freezer.  When I did the double batch, it never really firmed up and was not so easy to cut straight out of the fridge.  So, I've been keeping it in the freezer and it's prefect!

(Source:  Adapted from Allrecipes.com)

Print Friendly and PDF

Thursday, December 19, 2013

Apple Cake with Caramel Glaze

I love a cake with fresh apples!  And the brown sugar, caramel glaze puts this cake over the top.  Pecans are optional, but they go so well with the cinnamon and apple that unless you are totally against (or allergic to) nuts, I would absolutely use them. 


I used a spring form pan because I wanted the glaze to drip down the sides.  If you use a square or round cake pan, then your glaze will just be on top - and just as good!  


The cake is moist and sweet and just so good!  I think it's best served at room temperature, but I did end up keeping it in the fridge.  

Serves 8-10

Apple Cake with Caramel Glaze

2 eggs
1/2 cup vegetable oil
1 teaspoon vanilla
1 1/2 cups flour
1 cup sugar
1/2 teaspoon salt
1/2 teaspoon cinnamon
1 1/2 cups peeled and chopped apples
1/2 cup chopped pecans (optional)

For the glaze
1/2 cup packed brown sugar
3 tablespoons butter
1 tablespoon half & half
1/2 teaspoon vanilla

Preheat the oven to 350 degrees.  Grease an 8-pan (round or square) or a spring form pan.  In the bowl of a stand mixer, beat the eggs until they are light in color and foamy.  Add the oil and vanilla and mix well.

In a smaller, separate bowl, combine the flour, sugar, salt and cinnamon.  Add the flour mixture to the wet mixture and mix until just combined.  Stir the apples and pecans in by hand.  Pour the batter in the prepared pan and bake for 40-45 minutes until a toothpick inserted into the center comes out clean.  While the cake is still hot, prepare the glaze.

For the glaze: Combine all of the ingredients into a saucepan.  Cook over medium heat, stirring often until the mixture comes to a gentle boil.  Cook for 3-5 minutes.

Spoon the hot glaze over the still warm cake.  Let the glazed cake cool completely before serving.

(Source:  Adapted from Lick the Bowl Good)

Print Friendly and PDF

Friday, December 13, 2013

Chocolate Banana Brownies with Vanilla Glaze

 There is never a shortage of bananas in my house - some weeks I swear we go through 2 or 3 bunches.  Other weeks, not so much, and the bananas have to get consumed some other way.  Believe me, I'm not complaining...but when you already have banana muffins and banana bread in your freezer, it's time to try something new.    


This recipe is from Averie Cooks and it is so decadent.  Super fudgy brownies meets incredibly moist banana bread.  A combination of Greek yogurt and instant pudding mix will keep these soft and moist for days (if they last that long!).  You could omit the glaze, but it goes so well with these brownies - plus, it's pretty!  Drizzle it on or spread it just like you would if you were icing a cake.    
   
Makes 12-16 brownies

Chocolate Banana Brownies with Vanilla Glaze

1/2 cup melted butter (1 stick)
1 cup sugar
1/4 cup brown sugar, packed
1 egg
6 oz plain Greek yogurt
1 tablespoon vanilla extract
2 bananas, mashed
1 (3.9 oz) box of instant chocolate pudding mix
1/3 cup + 1 tablespoon cocoa powder
3/4 cup flour
3/4 teaspoon baking soda
1/2 teaspoon salt

For the vanilla glaze
1/4 cup butter, melted
1/3 cup light brown sugar
2 tablespoons milk
1 tablespoon vanilla extract
1 1/2 cups confectioner's sugar, sifted

Preheat the oven to 350 degrees and spray and 9 x 9-inch pan with non-stick cooking spray.  In a large microwave safe bowl, melt the butter.  Add the sugar, brown sugar, egg, yogurt and vanilla and whisk to combine.  Add the bananas and stir to incorporate.

Add the instant pudding mix and cocoa powder and whisk to combine.  Add the flour, baking soda and salt; stir until just combined.  The batter will be thick.  Pour into the prepared pan and bake for 40-44 minutes, or until top is set and edges have pulled away slightly from sides of pan (a toothpick inserted into the center will not come out clean because these are so fudgy).  Allow brownies to cool in pan for at least 30 minutes.  Meanwhile, make the glaze.

In a small saucepan, melt the butter over medium-high heat.  To the melted butter, add the brown sugar and bring to a boil, stirring almost constantly.  Allow the mixture to boil rapidly for 2 minutes, keep stirring.  Remove the pan from burner, allow to cool for 1 minute.  Add the cream carefully (mixture could bubble).  Whisk fast to incorporate the cream and calm the bubbling.

Add the vanilla and whisk carefully (mixture could bubble again at this point).  Add the confectioner's sugar 1/2 cup at time until desired glaze consistency in reached.  Drizzle glaze over brownies with a spoon or squeeze bottle or spread over the entire pan.  Allow glaze to set for a few minutes before serving.

Store in an airtight container in the fridge for up to a week or freezer for up to 3 months.  Unglazed brownies can be kept at room temperature, in an airtight container for up to 5 days.

(Source:  Recipe adapted from Averie Cooks)

Print Friendly and PDF

Sunday, September 22, 2013

Chocolate Chip Gooey Butter Cake

If you've heard of Paula Deen, you've probably heard of her Gooey Butter Cake.  Her variation includes using cake batter as a crust with a topping made of cream cheese, powdered sugar, eggs.  Almost like a cheesecake on top of a cake!  I love chocolate chip cheesecake so I decided to make my version with chocolate chips.  


I'd say my family enjoyed it quite a bit!  1/2 the pan gone before I could take my pictures...


You can also sprinkle with powdered sugar right before serving.  It's suggested that it's served at room temperature or warm.  I have this habit of keeping most of my baked goods in the fridge so I did the same with this and ate it cold.  Tasted just fine to me!  

Serves 6-8

Chocolate Chip Gooey Butter Cake

1 package of yellow cake mix
1 egg
1 stick of butter, melted 

For the topping
1 (8 oz) package of cream cheese, room temperature
2 eggs
1 teaspoon vanilla extract
1 stick butter, melted
1 (16 oz) box of powdered sugar
1 1/2 cups semi-sweet chocolate chips

Combine the cake mix, egg and butter and mix well with an electric mixer.  Pat the mixture into the bottom of a lightly greased 9 x 13-inch pan. 

In a large bowl, beat the cream cheese until smooth.  Add the eggs, vanilla and butter and beat together.  Add the powdered sugar and mix well.  Stir in the chocolate chips by hand.  Spread over cake batter and back for 40 to 50 minutes.  The center should be a little gooey so do not over bake.  

(Source:  Adapted from Paula Deen)
Print Friendly and PDF

Monday, April 29, 2013

Double Chocolate Peanut Butter Granola Bars

Loaded with chocolate chips and peanut butter chips, these granola bars are one of the easiest snacks you can whip up.  So tasty and will give your kids protein from the peanut butter and tons of energy.  No sugar added.  A fantastic after school snack that will take you less than 10 minutes to prepare.  


Double Chocolate Peanut Butter Granola Bars

1/2 cup semi-sweet chocolate chips plus 1 tablespoon, divided
1/2 cup reduced fat peanut butter, divided 
1/4 cup fat free milk
2 cups oats
1/4 cup peanut butter chips plus 1 tablespoon
1/4 cup honey
1 tablespoon vanilla extract

In a microwave safe bowl, combine 1/4 cup semi-sweet chocolate chips, 1/4 cup peanut butter and the milk. Microwave for 30 seconds and stir until melted (if necessary, put in for another 10 seconds).  Stir in the remaining 1/4 cup of peanut butter, 1/4 cup of chocolate chips, oats, 1/4 cup peanut butter chips, honey and vanilla extract.  Set aside.

Spray a 8 x 8-inch pan with non-stick cooking spray, line with wax paper and spray the paper.  Pour the granola mixture in the pan and with moistened fingers, press into bottom of the pan.  Sprinkle the remaining 1 tablespoon each of the chocolate chips and peanut butter chips and press. Place in the freezer to firm up for about 10 minutes, flip the pan over and peel off the wax paper. Cut into squares or bars (I got about 15 bars out of mine).  Store in the fridge.  

Print Friendly and PDF

Tuesday, January 29, 2013

Cinnamon Roll French Toast Bake

I feel like I've been slacking, but I haven't been baking much lately.  Well, strike that...of course I've been baking, just not anything new that I've wanted to share with y'all.  Over the past couple of weeks we've had Chocolate Cherry Cake (it was my birthday after all!) and my Chocolate Chip Blondies.  So PLENTY of baking being done, but you've seen all those!  

I did make something amazing for breakfast over the weekend that I absolutely had to share.  It's a french toast bake with, wait for it...canned cinnamon rolls!  How good are those on their own?!  Well, if those are good, then this is extreme.  Extremely tasty and extremely sweet that is.  My family flipped out for this (we may have eaten the whole thing that morning - there are 4 of us - this serves 12...yikes.  But you can't really go by those serving suggestions, right?). 


You'll start with 2 cans of the cinnamon rolls, cutting each roll into 8 pieces and placing in a greased baking dish.  Then a mixture of eggs, half and half, vanilla and cinnamon are poured all over the top.  Then if you can even stand it, maple syrup goes on top of THAT! 


Bake for about 25 minutes and the cinnamon rolls get all puffed up and golden.  Let cool for 15 minutes. 


 In the meantime, you'll take the icing that comes with the cinnamon rolls, melt it in the microwave and pour all over the top (seriously, drooling yet?).  If you want to get your kiddos ready for day by way of a sugar high, then this is your breakfast!  You can serve it with a little extra drizzle of maple syrup, too.  

 Serves 12

Cinnamon Roll French Toast Bake 

2 cans (12 oz) cinnamon rolls
5 eggs
1/2 cup half & half
2 teaspoons cinnamon
2 teaspoons vanilla 
1/2 cup maple syrup, plus more for serving
Icing from the cinnamon rolls 

Preheat oven to 375 degrees.  Grease a 13x9 or large oval baking dish with non-stick cooking spray.  Open the cans of cinnamon rolls and separate the rolls.  Cut each into 8 pieces and place in baking dish.  In a medium bowl, combine the eggs, half & half, cinnamon and vanilla.  Pour over top of the cinnamon rolls and then drizzle the 1/2 cup of maple syrup on top of that.  

Bake for 25-28 minutes until golden brown.  Cool for 15 minutes.  Remove the covers from the icing and microwave at 50% for 10-15 seconds or until thin enough to drizzle over the french toast bake.  Serve with maple syrup if desired.

(Source:  Adapted from Pillsbury.com)

Print Friendly and PDF

Monday, November 12, 2012

Chocolate Chip Blondies

I'm not sure if these are so much "blondies" as they are just plain and simple chocolate chip cookies in bar form.  But, regardless of what you or I may call them, one thing is certain - these are gooey and addicting, buttery, chocolaty and so good.  I pull mine out of the oven when the top starts to turn golden brown, whether they are completely done in the middle or not.  A little underdone gives them that chewy, moist center that I love.  


Chocolate Chip Blondies

2 sticks of butter, room temperature
3/4 cup sugar
3/4 cup brown sugar
2 eggs, room temperature
1 teaspoon vanilla
2 cups flour
1 teaspoon salt
1 teaspoon baking soda
2 cups chocolate chips

Preheat oven to 350 degrees.  In the large bowl of a stand mixer, cream the butter and sugars together until light and fluffy.  Add eggs, one at a time, mixing to incorporate after each one.  Add vanilla and mix to combine.  

In a small bowl, combine flour, salt and baking soda.  Gradually beat in  flour mixture until combined. Remove bowl from stand mixer and add chocolate chips.  Stir by hand to combine. 

Pour batter onto a 9x13 baking pan and smooth so it's even across the pan.  Bake for 20-25 minutes until the top is golden brown.

Print Friendly and PDF

FREE eCookbook!

Search

My photo
I'm a super busy mom of 3 and a Beachbody coach. Follow along as I try to find a balance between eating good food and keeping my family healthy and happy! We eat mostly clean with a few fun treats thrown in every once in awhile. Thanks for stopping by!

What I'm Pinning...

I'm on Instagram!


Rivit Media
PublisherMunchkin Land Designs
 
Designed by Munchkin Land Designs • Copyright 2012 • All Rights Reserved