I wasn't really sure what to call these - they are like a cookie, but they pretty much melt in your mouth as you are eating them. Very peanut buttery and dense.
And they sure are rich! Make sure you have a glass of milk handy. This recipe doesn't yield a lot, but it's really about all you need. When I was craving something sweet, I would eat like 1/2 of one of these and I was good.
Yields 9 cookies
{Clean Eating} Peanut Butter Meltaways
1 cup natural peanut butter
1/4 cup + 1 tablespoon maple syrup
1 tablespoon unsweetened cocoa powder
1/4 teaspoon baking powder
1/4 teaspoon sea salt
Preheat oven to 350 degrees. In a food processor, combine all of the ingredients. Pulse until everything comes together. Use a small cookie scoop to drop cookies onto a baking sheet. Bake for 10-12 minutes and let cool completely before removing from cookie sheet. Store in an airtight container in the fridge.
Posts may contain affiliate links. That means The Art of Comfort Baking will automatically receive a small commission, but your cost will remain the same! Thanks for your support!
I'll be the first to admit that I am not great about planning our meals or prepping for the week. Then what happens? I run short on time or short on ideas...and then we end up getting take-out! No more! It's all about the planning...
I wanted to share a very simple, very easy way to start off meal planning and prepping your meals for the week. I choose Sundays as my planning and prepping day. My husband is around to help with the kids while I'm in the kitchen and it makes it so much easier! Or he and my 4-year old help some when they can. It's a family affair!
This was a Rosemary Olive Oil bread that I made on Sunday - well just the dough. I let it sit overnight then baked it the next day. And I had just run out of my homemade red sauce so I made a huge batch - 8 of these 32 ounce deli containers. Seven went into the freezer, 1 into the fridge.
I also LOVE freezer meals. Prepare a couple at a time, then you'll have a meal in a pinch when you know you'll have a super busy day ahead. (Please forgive the Instagram pictures...my husband took my camera for a product shoot and I still didn't have it back when I took these!)
Meal planning will save you time, energy, money and STRESS! You'll be able to control the nutrition in your family's meals. It's an all around win-win!! And without further ado, here are my simple, but effective meal planning and prepping tips. I've included a few of our favorite weekly recipes as well.
Meal Planning/Shopping
1. Grab your calendar. What does your week look like?
Slow Cooker meals obviously work great on days that you are running all over creation. Dinner is ready by the time you sit down with literally no effort on your part! Plan a larger meal when you know you'll have more time, like a Saturday or Sunday.
2. Keep a list of your favorite weekly meals and ALWAYS keep those ingredients on hand.
We are creatures of habit and tend to have the same things from week to week. And there is nothing wrong with that! Obviously as a blogger, I like to try new things, but that takes planning as well. And if I know my kids absolutely love something (like my Stir Fry!) then why wouldn't I make it every week?
3. Plan your breakfast, lunches and dinners for the week.
Take a look in your pantry, fridge and freezer and make your grocery list for any ingredients you are missing based on your plan. Avoid buying items you already have, unless they are on sale and you are stocking up.
* Our favorite breakfasts are overnight oats and Whole Wheat Banana Pancakes (make a huge batch and freeze them!).
* Lunches for the kids are easy - usually PB&J and fruit. For me and my husband, I like to make a salad that will keep in the fridge for the week, like this Southwestern Quinoa Salad. Or turkey sandwiches in a wrap or on whole wheat bread.
4. Make the most of your grocery shopping.
Buy in bulk or buy extras when your pantry staples are on sale. I always laugh at my husband when he tells me we are out of something - especially when it's peanut butter or coffee, or something we use EVERY day. Doesn't he know by now that I have an entire shelf in one of our cabinets dedicated to "overstock" of those items? Publix does BOGO every week - and you can bet that if peanut butter is on sale, I'm walking out of there with at least 4 jars!
We shop at Sam's Club where we get our meats and eggs - and it's all good stuff! Cage-free, and never any hormones or antibiotics added.
Meal Prep
As a disclaimer, I am not the type of meal prepper that makes all of my dinners for the week on Sunday and stores them in individual portions for easy reheating later. That does not appeal to me at all. Just KNOWING what I will be making each night - or having a freezer meal or two on standby - is more than enough planning for me. So here's what I do on Sunday to prep!
1. Start with a clean kitchen!
Empty dishwasher, all utensils, pots, pans and measuring cups clean and ready to use. As you use something, rinse it quick or if you know you won't need again, put it straight in the dishwasher. This is how I do NOT end up with a complete disaster of a kitchen at the end!
2. When you return from the grocery store, organize everything on the counter in piles according to your recipes.
Of course put the freezer stuff away, but generally leave out everything you are going to use (your meats can go in the fridge too if it's not going to be the first thing you use).
3. Pull out your list of meals for the week and get cooking!
I start with things that either need to sit for awhile before cooking (like yeast breads) and easy stuff, like cooking hard-boiled eggs for snacks. Overnight oats are usually one of the first things I knock out too (so easy!!). Other than that, there is really no rhyme or reason to what I get done next. I just keep checking things off my list and moving along.
Even though I don't actually cook my dinners in advance, I will do the prep work for them. Chop and prepare the veggies and portion out the meat I'll need for each night. Those steps alone save me so much time each night!
Remember to chop once, use twice. If you have diced onion in two different recipes, dice it all at once and separate what you need for both. Work smarter, not harder!
Bonus Tip: if you have the budget and ingredients, consider doubling your meals as you are prepping. A ton of Slow Cooker meals can be made ahead as a freezer meal. Last Friday night, I was making Oven-Baked Fajitas. I already had the chicken, the peppers and onion out, so I just kept slicing - and ended up with 3 meals total! One for that night and two that I tossed all the ingredients into freezer bags and will save for another week.
I do this with lasagna too. I'll always make two at once, and one goes into a foil baking pan and right into the freezer.
4. Put all the food away - fridge or freezer.
Tupperware containers, gallon freezer bags, deli containers and mason jars are all necessities for meal prepping. Here are some of my favorite items for storage (with clickable links for easy purchase!):
Overnight Oats: mason jars, Weck canning jars, or even save nicer jelly jars (like Bonne Maman) and reuse them!
Freezer Slow Cooker Meals: Glad gallon size freezer bags. Fill the bags, then flatten out as you seal it. Store laying flat and you can keep stacking them and stacking them (see picture)!
Salads, prepared veggies and meats, soups and sauces: deli containers in various sizes (16 and 32 oz) or Glad food storage containers.
And finally...
The whole process beginning to end will probably take you 3-4 hours. This is why I do mine on Sunday when my husband is around. Most of all, I just need him to keep the kids busy, but it's not always that easy. I like to have my daughter (who is 4) help me when she can. She is great at making muffins! My son, who is almost 3 likes to "help" also but you know how that goes. So, really, who am I kidding - my meal prep probably takes closer to 6 hours, haha! But with the kids involved, I don't feel so removed from being part of the family that day.
We have found that meal planning and prepping is the easiest and best way to have healthy and nutritious meals all week long. It takes the guess work out of dinners, it saves you time and money - no food goes to waste! You shop for what you need and WILL use.
I hope these tips will help you get started! Please post your questions in the comments if I missed anything!
Posts may contain affiliate links. That means The Art of Comfort Baking will automatically receive a small commission, but your cost will remain the same! Thanks for your support!
I made this as a side for dinner one night and ended up eating it for lunch for the next 2 days. It's hands-down my absolute favorite way to prepare quinoa right now! The flavors are still very summery, but hey, when it's 80 degrees and October then I think it's all right.
Everything about it tastes so fresh - and it keeps perfectly in the fridge! It made a perfect quick lunch for me that week. I've also made this with diced Roma tomatoes and I actually do prefer it that way. I'm not a huge cherry tomato fan but they looked good in the store and I knew they would look pretty in the salad (great reason, right?). And they do give that added burst of sweetness that goes really well with this salad.
I always seem to come back to my all time favorite flavor combinations - lime, cumin and cilantro. If your lime is really juicy then you may want to add a little less than called for. But if you add too much, another splash of olive oil should tone it down. Just add to your taste.
Serves 6
Southwestern Quinoa Salad
1 cup quinoa
2 cups water
1/4 cup olive oil
Juice of 1 lime
2 teaspoons cumin
1 teaspoon salt
1 1/2 cups cherry tomatoes, halved
1 cup black beans, drained and rinsed
2 tablespoons red onion, diced
1/4 cup fresh cilantro, chopped
salt and pepper
Place the quinoa in a fine mesh strainer and rinse until the water runs clear. Bring quinoa and water to a boil in a saucepan. Reduce heat to medium-low, cover and simmer until quinoa is tender and water has been absorbed, 10 to 15 minutes. Set aside to cool.
Whisk olive oil, lime juice, cumin and 1 teaspoon of salt in a small bowl. Combine quinoa, tomatoes, black beans and red onion together in a separate bowl. Pour dressing over quinoa mixture; toss to coat. Stir in cilantro, season to taste with salt and pepper. Serve at room temperature or chilled.
This is one of the most exciting blog posts I have ever written! I had the privilege of being selected as a Cookbook Ambassador for Lisa Leake's 100 Days of Real Food. It's the coolest thing!! She sent me a free signed copy and I get to share a recipe from the book with you. So much fun!!
Lisa's book was released on August 26th and when I received it in the mail, I was ecstatic! I only recently started cutting processed foods out of our diet (and to be honest, we are still not 100% there). I started following 100 Days of Real Food on Facebook and Pinterest because it seemed like a good starting point. I was not wrong! Her blog has helped us transition easily to eating more whole, clean foods in such a real, honest way.
The cookbook is GORGEOUS!! And so much great information. She shares how and why she started on the 100 day challenge to cut out processed and refined foods. Grocery lists templates, how to navigate the grocery store and what to look for in dairy, meats, etc. The recipes all look delicious and are quick and easy for super busy families (like me and mine!!). The Cinnamon-Raisin Quick Bread is in the lunch box section - which includes tips for packing real-food lunches. And just in time for school to start again!
I think it was a hit in our house...what do you think? I was kicking myself for not making a double batch! But, it's also so easy that I'll for sure be making it again and again. I found my two-year old son dragging one of his play table chairs across the kitchen floor so he could reach the bread on the counter more than once...
So this is what you came for, right? Lisa's recipe for Cinnamon-Raisin Quick Bread. Lucky you, a sneak peek from the book! I cannot wait to cook my way through it. We've already made the Veggie Corn Chowder as well and it was a hit with the whole family. Enjoy!!
I loooove a good no-bake cookie. And if you follow this blog, you know I'm pretty obsessed with an oat/peanut butter combination. Needless to say, I'm pretty psyched that I now have a go-to clean eating no-bake cookie to make when I'm in need of something sweet!
Little bites of yumminess!! The chewiness of the raisins is an awesome addition and I would not recommend leaving them out (unless you despise raisins). Store in the fridge or freezer because they get very soft and sticky at room temperature.
Yields 12 cookies
{Healthier} No-Bake Cookies
2/3 cup coconut sugar
4 teaspoons unsweetened cocoa powder
1/4 cup fat free milk
1/4 cup natural peanut butter
1/2 teaspoon vanilla extract
2 cups old fashioned oats
1/4 raisins
Stir coconut sugar, cocoa and milk in a microwave safe bowl. Microwave on high for one minute. Stir. Add peanut butter and vanilla and stir until well blended. Stir in oats and raisins until combined. Using a small cookie scoop, drop the mixture onto a wax paper lined baking sheet. Chill in fridge for about an hour (or freezer for 10 minutes) before serving. Keep leftovers stored in fridge.
I recently discovered Lara Bars and I'm almost mad I did because - why are they so expensive? I usually buy them when they are on sale at Target or my Kroger for a $1 a piece. Then, I discovered that you can make your own! And it's TOO easy!
Three ingredients - almonds, dates (preferably Medjool) and another dried fruit. I used raisins. But apricots, cherries, even cranberries would be great and give you all sorts of different flavor options! The dates I found at Publix, they have these shelves underneath their produce and I just happened to be looking down. $3.99 for a nice size plastic tub - I was able to make bars 3 different times with that amount and have about 1/2 cup leftover!
Yields 8 bars
Easy Fruit and Nut Bars
1 cup almonds
1 cup raisins
1 cup pitted, dried dates (Medjool dates)
2 tablespoons mini chocolate chips (optional)
Combine the almonds, raisins and dates in a food processor. Pulse a few times to break them up. Process continually for 30 seconds. Scrape the edge of the bowl.
Process continually for 1-2 minutes until a ball is formed. If using chocolate chips, add with about 30 seconds left so they don't get completely chopped up.
Dump mixture into an 8 x 8-inch baking pan and press down firmly to form an even layer. Chill for 1 hour or overnight. Cut into 8 large bars or 16 squares. Keep bars in fridge for a few weeks or in the freezer for up to 3 months.
I love pasta salads and am constantly on the search for new and different ones. I am in love with this recipe! Since making it the first time, I've made it quite a few other times. Great to take to a summer picnic or as lunch on the beach.
It's so light. No mayo or other heavy ingredients. And the flavors just blend so well together. I used a rotisserie chicken to make it even easier! I also used frozen, but thawed, spinach leaves. You can use fresh spinach and it won't appear so wilted.
The original recipe also called for shredded carrots, but I didn't have any on hand. I may add them another time for an added crunch - or a bell pepper. Either way, it's just an all around tasty and good lookin' pasta salad!
Serves 4
Asian Pasta Salad
8 oz whole wheat pasta
1/2 cup olive oil
1/4 cup sesame seeds
1/3 cup soy sauce
1/3 cup rice vinegar
3 tablespoons honey
1 teaspoon sesame oil
2 tablespoons diced green onion (green and white parts)
1 teaspoon minced ginger
1/4 teaspoon sea salt
1/4 teaspoon pepper
1 1/2 cups shredded, cooked chicken breasts
1 cup baby spinach
1/4 cup chopped, fresh cilantro
Make pasta as directed on box and set aside. Mix olive oil, soy sauce, vinegar, honey, sesame oil, green onion, ginger, salt and pepper with a whisk until combined.
In a medium bowl, combine pasta, chicken, spinach and cilantro. Pour dressing mixture over ingredients in bowl and toss until everything is coated evenly. Check for seasoning and add more salt and pepper to taste. Serve and keep leftovers in fridge.
I was so in the mood for chocolate ice cream the other day! I remembered making Ina Garten's chocolate sorbet ages ago so I looked up that recipe again. And in an effort to make it "cleaner" I substituted the white sugar for honey. Perfection!!
I used regular cocoa powder, but the added coffee makes this sorbet taste so decadent and rich - like dark chocolate! I know they make a dark cocoa powder so you may even want to try that (and omit the coffee). Like a grown up version of chocolate ice cream and it's so good!!!
Serves 4
Chocolate Sorbet
3/4 cup honey
1/2 cup cocoa powder
1/4 teaspoon pure vanilla extract
1/8 teaspoon sea salt
2 cups water
1/4 cup brewed coffee
In a large saucepan, mix the honey, cocoa powder, vanilla, and salt. Stir in 2 cups water and the coffee. Cook over low heat until the ingredients are dissolved. Transfer to a bowl, cover with plastic wrap and refrigerate for about an hour.
Freeze the mixture in an ice cream maker according to the manufacturer's directions. The sorbet will still be soft; place it in a plastic container and freeze for 1 hour or overnight.
Mm...mmm...little bites of goodness!! Simple to put together and the ingredients are everything you have in your pantry and fridge. No sugar (except for the chocolate chips, which are optional).
Perfect for little mouths - my kids love these! And sure to curb your sweet tooth craving, but you don't have to feel guilty about eating them. I also don't see why you couldn't eat these for breakfast on the go - just a mini version of a healthier muffin!
Bananas, unsweetened applesauce, oats, milk, raisins and chocolate chips (again, optional but I just can't help myself!). If you omit the chocolate, you can use 1/2 cup of raisins. I use all organic ingredients when I can!
Yields about 16 cookies
Banana Raisin Bites
3 ripe bananas, mashed
1/3 cup unsweetened applesauce
2 cups oats
1/4 cup skim or almond milk
1/4 cup raisins
1/4 cup chocolate chips
1 teaspoon vanilla extract
Preheat oven to 350 degrees. Combine all of the ingredients in one bowl and stir until everything is mixed together. Using a small cookie scoop, drop the batter on a cookie sheet. Bake for 15-20 minutes until they turn slightly golden.
I'm addicted to making granola bars!! So easy and my kids LOVE them. I'm always looking for new add-ins and flavors. These are ridiculously good. I cut them into mini squares and they were perfect for my little ones. P.S. these are made with all clean eating ingredients (except for the chocolate chips, which you can omit)!!
Makes approximately 24 square bars
Coconut Peanut Butter Granola Bars
1 cup Earth Balance coconut peanut butter spread (or use regular peanut butter)
2/3 cup honey
2/3 cup pure maple syrup
2 teaspoon vanilla extract
1 teaspoon sea salt
6 cups old fashioned oats
1 cup unsweetened shredded coconut
1/2 cup raisins
1/2 cup dried apricots, diced
1/4 cup semi-sweet chocolate chips (optional)
Line a 9 x 13-inch pan with foil and spray with non-stick cooking spray.
In a large bowl, combine the peanut butter, honey and maple syrup and heat for 30 seconds. Stir until everything melts and combines together. Add the vanilla and sea salt, stir to combine. Stir in all of the dry ingredients.
Spoon granola mixture into the lined pan and press down firmly. At this point, you could also roll them into bite sized balls. Refrigerate for at least 2 hours before cutting. Turn pan upside down onto a cutting board and peel back the foil. Cut into squares or rectangles, whichever you prefer. Keep in fridge because they do get very soft at room temperature.
This is a very quick and easy, healthy meal that is great for a weeknight when you don't have much time. The ingredients are simple and fresh and it's so good!
You can make this according to your tastes - omit certain veggies or add new ones (peppers, avocado?). I just used what we had on hand at the time. I've also become a HUGE fan of red onion and don't mind it raw, which is so weird because I generally don't like any onions raw - or cooked for that matter (unless they are really hidden in a dish).
We did nothing but a little squeeze of lime mixed in. The ingredients are so flavorful together that it didn't really need anything else in my opinion. You could top yours with sour cream, salsa, guacamole; whatever you like!
Serves 2-3
Chicken Burrito Bowls
1 tablespoon coconut oil (or olive oil)
2 large boneless, skinless chicken breasts, diced
1 1/2 tablespoons salt-free seasoning (I used Mrs. Dash Southwestern blend)
1 cup canned black beans, rinsed and drained
1 cup canned corn (or thawed if frozen)
1 Roma tomato, diced
2 tablespoons red onion, diced
1 - 2 tablespoons fresh cilantro, chopped
1 lime
2 cups cooked brown rice
Heat coconut oil over medium heat in a medium skillet. Add diced chicken and toss in seasoning. Cook chicken until done throughout, about 7-10 minutes. Meanwhile, dice and drain all the veggies and beans and cut the lime in half.
Place about a cup of rice each in 2 bowls and top with equal portions of the chicken and veggies/beans to taste. Squeeze about 1/2 of a lime over each bowl and stir together. Top with sour cream, salsa or guacamole if desired.
I'm a big fan of chicken salad. My favorite has always been made with mayo, grapes, pecans and a squeeze of lemon served on a croissant. But...since we've been doing a Clean Eating challenge with my Beachbody team, I needed to get rid of the mayo and the croissant if I wanted chicken salad. I've been using Greek yogurt as a substitute for all my oils, sour creams and mayonnaise for the past couple of weeks so decided to swap it out in my chicken salad - SO good!!
Greek yogurt is a little tangy, but the sweetness of the grapes and apples off set that a little. This is just absolutely delicious. My husband doesn't even like chicken salad and he loved this. Such a great lunch - make on Sunday and have an tasty, healthy, clean eating lunch for the next couple of days!
Serves 4
Greek Yogurt Chicken Salad
2 large boneless, skinless chicken breasts
1/2 cup non-fat Greek yogurt
1/3 cup diced celery
1/3 cup diced apple
1/3 cup grapes, cut in half
Juice of half a lemon
Pan steam the chicken by filling a deep skillet with about an inch of water, add chicken and bring to a boil. Cook for about 20 minutes or until done throughout. Shred, place in a medium bowl. Add the Greek yogurt, celery, apple, grapes and lemon juice. Stir to combine and salt and pepper to taste. Serve on toasted wheat bread or on top of lettuce.
I'll say it again - I'm addicted to avocados this summer. Every which way! In guacamole, on sandwiches, sliced plain with a pinch of sea salt. But this...to die for.
Avocado mashed with green onion and cilantro. So simple, so fresh and the BEST appetizer! I served ours on a multi-grain baguette that I drizzled with some olive oil, then toasted. I first had this years ago when my sister served it at a dinner at my mom's house. I can see why she said she made it all the time!
Serves 2
Avocado Toasts
4 slices from a baguette
Olive oil
1 avocado
1 green onion
1 tablespoon fresh cilantro, chopped
Sea salt
Preheat oven to 400 degrees. Lay the slices of bread on a baking sheet and drizzle with olive oil. Toast in the oven until they start to turn golden, about 5-8 minutes.
Meanwhile, cut and scoop out the insides of an avocado and place in a small bowl. Dice the green onion, using the white and green parts and add to the bowl. Add the cilantro and a pinch of sea salt and mash everything together with a fork.
Evenly distribute the avocado mixture onto each slice of toast. Serve immediately.
So, it's World Cup time and we are pumped!! My husband especially, but he has gotten me really into soccer and we have a lot of fun watching it together. Typically, when it comes to big games like this in our house, we always do "game-day" food. Right? Think dips and wings, all that good stuff...
Well, I recently became a Beachbody coach, which is the BEST thing I have ever done in my life (I'm going to have to do a whole post about that because I can go on forever about it if I don't stop myself!). So, we are exercising and eating right (or I should say better) and I just joined a Clean Eating challenge group that started the day of the US vs. Ghana game. Husband was not happy. No game-day food?
Well, needless to say, I had to come up with something. And these were a hit!! I will absolutely make them again and again. And neither of us missed the breading or the fried flavor typical of Buffalo chicken tenders. I served them with Ranch dressing, which I didn't use because it was bottled ranch and I was sticking to my Clean Eating challenge. Still on the hunt for that perfect homemade ranch dressing recipe...
Serves 2
Grilled Buffalo Chicken Tenders
1 package of boneless, skinless chicken tenders (usually about 6 to a package)
1/4 cup Frank's Red Hot sauce, plus more for after they are cooked
1 tablespoon salt-free seasoning blend
In a resealable zip lock bag, combine everything, seal and shake to make sure all the chicken is coated in the sauce and seasoning. Place bag in fridge to marinade for about a half an hour.
Preheat grill. Cook the chicken strips for 5-6 minutes on one side, then flip and cook for an additional 4-5 minutes until the juices run clear and the internal temperature of the thickest part reaches 165 degrees.
Coat with additional sauce if desired and serve with your favorite ranch or blue cheese dipping sauce.
Are you interested in learning more about Beachbody? Or any of our challenges? Message me and/or friend me on Facebook!
I'm still in awe as we try new and healthy recipes how tasty it can be, even when you are "clean eating". Here is a simple, ridiculously delicious, healthy meal that your whole family will enjoy. Who doesn't love a good grillin' recipe for the summer?
I topped our turkey burgers with my Super Simple, Super Addicting Guacamole. By the way, I'm officially obsessed with avocados. I make this guacamole so much - it's SO easy. You don't even need to measure anything, just throw it all in to your taste. I hope you'll check it out!
Serve the turkey burger on a bun or just eat it with a fork. Have you tried grilled corn yet? Here is one of our absolute favorite recipes for that as well (grilled corn with lime and chili powder, yum!). Makes an amazing side dish for this dinner.
Preheat your grill. Combine all of the ingredients for turkey burgers together in a large bowl. Mix well using your hands. Divide the mixture into 4 equal parts and shape into 4 patties, using your thumb to make an indent in the middle (the burgers will puff up when you cook them and this will ensure they come out flat across the top). Grill until cooked throughout, about 3-4 minutes on each side.
Top with my guacamole (or store bought) and/or your favorite toppings. Serve with a whole wheat bun or plain!
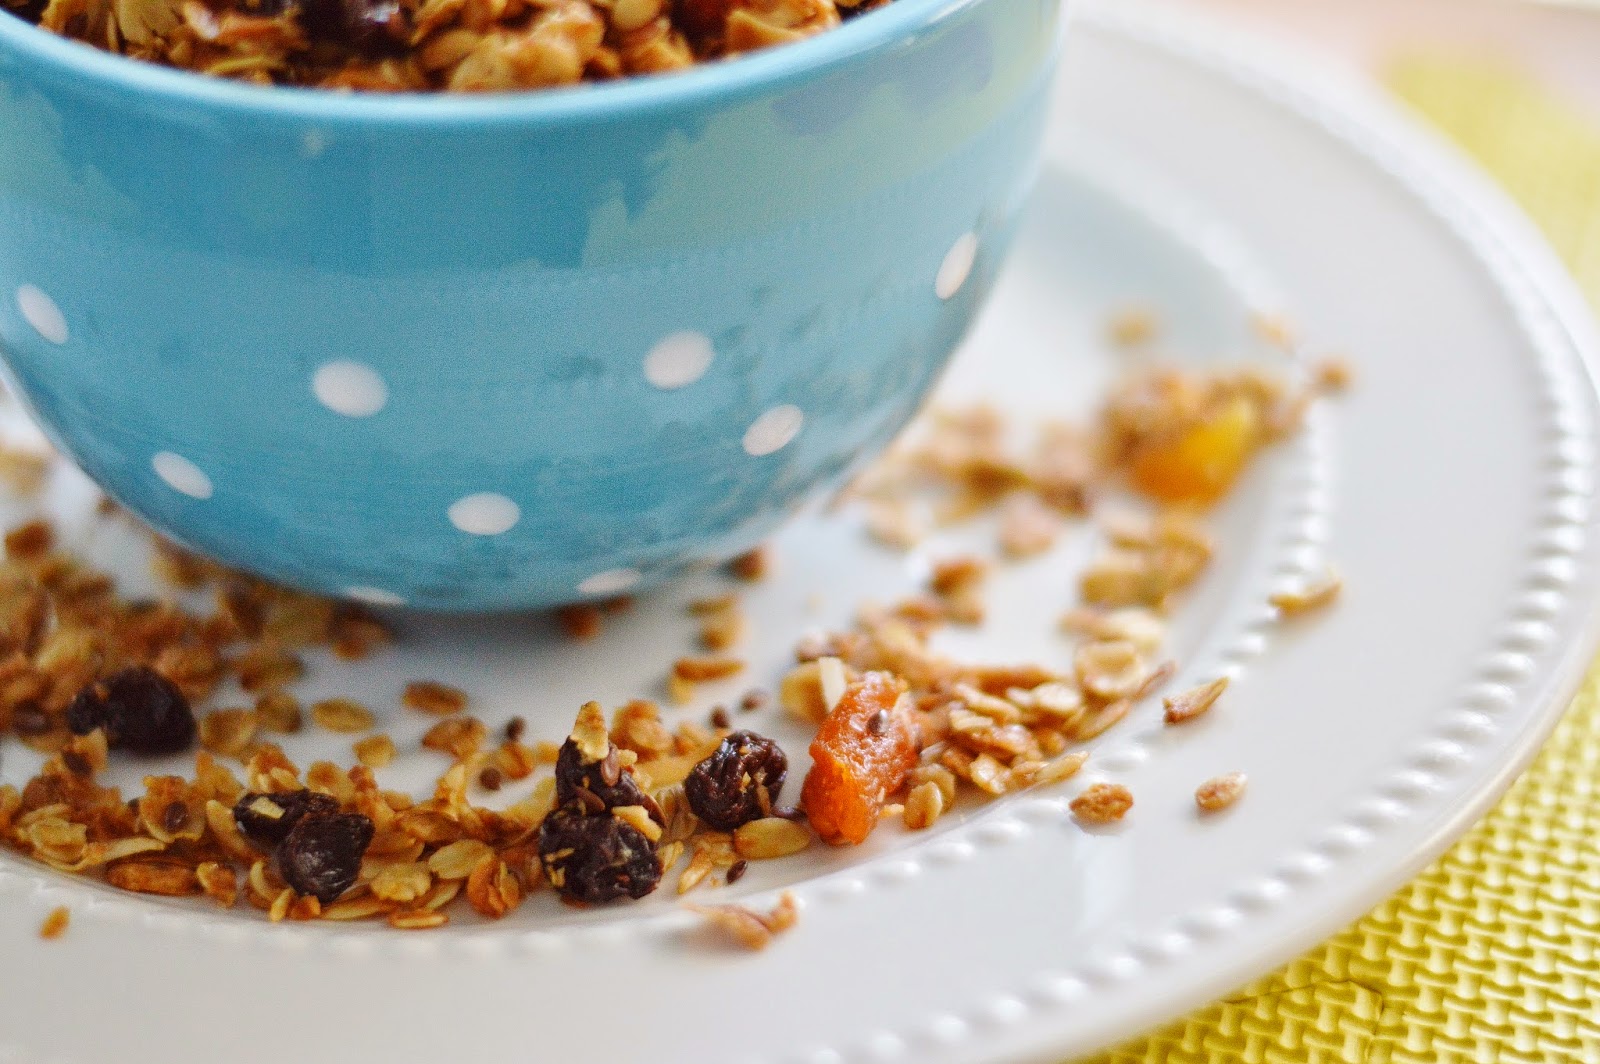
You can't believe how easy it is to make your own, healthy granola. It's such an amazing snack on top of yogurt or even as cereal with milk!
I chose raisins and dried apricots, but you can do any kind of dried fruit you like! Cranberries, dates, cherries, etc. Add almonds or walnuts, even chocolate chips (after it's done baking or you might have a mess on your hands!).
My two-year is constantly grabbing the container off of the counter and grabbing handfuls of it. I love that we've done a lot of "cleaning" up in our house as far as our food choices and it doesn't seem to bother anyone! My husband mixes the granola into greek yogurt with a little PB2 or a dollop of peanut butter. SO good!!
Serves 4
Maple-Honey Coconut Granola
2 1/2 cups old fashioned oats
1/2 cup raisins
1/2 cup dried apricots, roughly chopped
1/2 cup unsweetened shredded coconut
2 tablespoons flax seed
1/2 teaspoon sea salt
1/2 cup coconut oil, melted
1/3 cup maple syrup
2 tablespoons honey
2 teaspoons vanilla extract
Preheat oven to 350 degrees. Combine all the wet ingredients in one small bowl and the dry ingredients in another larger bowl. Pour the wet over the dry ingredients and mix until everything is coated. Pour onto a large baking sheet in an even layer and bake for 15 minutes. Shake or stir the granola on the baking sheet and bake for another 10-15 minutes until the granola becomes golden. It may still be a bit "wet" but once it is out of the oven for a couple of minutes, it will become crunchy.
I'm not kidding when I say this is super simple and super addicting. I'm obsessed. I buy the ingredients for this every time I go to the grocery store because I make it so often!
Really, there's no need to measure. Just throw your ingredients in to taste. You may like more red onion or jalapeno. Or more lime juice (or less!). Taste as you go along. I honestly don't even add salt, I don't think it needs it. You may want to, up to you.
Serve with tortilla chips, veggies, crackers or on top of chicken or fish. You'll soon find out why I'm addicted to it! Tastes like summer in a bowl!
Makes 2 cups
Super Simple, Super Addicting Guacamole
2 ripe avocados, diced
1 Roma tomato, seeded and diced
2 tablespoons red onion, minced
Juice of 1/2 lime
1 tablespoon minced jalapenos (I use from a jar)
Combine everything in a bowl, stir and mash together to desired consistency. Serve with veggies, tortilla chips or on top of grilled meat or fish.
By far our favorite weeknight meal. So easy, so incredibly good and healthy! I make this at least once a week and will probably make it even more now that summer is here and we will be grilling constantly.
This is actually based on my recipe for Honey Lime Chicken Skewers, but I think I grilled the chicken on the skewers that one time and never did it again. Ain't nobody got time for that! Too much preparing...the cutting, the skewering, no thanks. I also added cilantro to this marinade because I lately cannot live without cilantro. You can also leave out the Sriracha if you don't want it spicy.
The marinade makes enough to prepare the chicken and to save some for after it's cooked. We always eat this with brown rice, then drizzle the extra sauce over the top of the grilled chicken and rice. Once you make this dish, I know you'll have it on repeat as well!
In a 2-cup mixing cup, combine the soy sauce, honey, olive oil, cilantro, lime, garlic and Sriracha sauce. Whisk until everything is combined. Pour half into a large zip lock plastic bag and add the chicken breasts. Seal bag and shake to ensure all the chicken breasts are coated. Place the bag in a bowl (just in case there is a leak or spill!) and allow to sit in the fridge for an hour. Place the other half of the marinade in the fridge until ready to use.
Preheat grill to medium high heat. Grill chicken for 6 to 8 on each side, until juices run clear. Serve over rice and with the extra sauce drizzled over or as a dip.
I'm a super busy mom of 3 and a Beachbody coach. Follow along as I try to find a balance between eating good food and keeping my family healthy and happy! We eat mostly clean with a few fun treats thrown in every once in awhile. Thanks for stopping by!
.JPG)
.JPG)


.JPG)
.JPG)
.JPG)


.JPG)
.JPG)
.JPG)
.JPG)
.JPG)
.JPG)
.JPG)
.JPG)
.JPG)
.JPG)
.JPG)
.JPG)

.JPG)


.JPG)
.JPG)
.JPG)
.JPG)




.JPG)
.JPG)
.JPG)