Showing posts with label chicken. Show all posts

Wednesday, May 20, 2015

Chicken and Quinoa Enchilada Bake

Quite honestly one of the best casseroles I have ever had.  Healthy, filling and incredibly delicious. Made for dinner one night and literally ate it 3 days straight for lunch.  Amazing!  


In an attempt to keep this fairly clean, I made my own enchilada sauce.  You might think you don't have time for that.  You are WRONG! :) This is the quickest, easiest homemade sauce ever.  And so much better for you than store bought.


You can skip the chicken if you want to keep this meatless.  I liked the added protein and thought it made for a more substantial dish.  A rotisserie chicken would keep this super simple - just shred and add!


A great meal to make for company because it really makes a lot.  Does NOT taste healthy or lack in flavor at ALL.  Unfortunately, my kids would not eat it - or maybe that was a good thing?  More for me and lunches for the week done!

Serves 6 
Chicken and Quinoa Enchilada Bake

1 cup quinoa
1 cup cooked and shredded chicken
1 1/4 cup Homemade Enchilada Sauce (or 1 (10 oz) can store bought sauce)
1 (4.5 oz) can chopped green chiles, drained
1/2 cup corn kernels (frozen or canned)
1/2 cup black beans, drained and rinsed
2 tablespoons chopped fresh cilantro
1/2 teaspoon cumin
1/2 teaspoon chili powder
Sea salt and freshly ground black pepper
3/4 cup Mexican blend shredded cheese
1 Roma tomato

In a large saucepan, cook quinoa in 2 cups of water and according to package directions.  Set aside.  Preheat oven to 375 degrees.  Lightly spray an 8 x 8-inch baking dish with non-stick spray.  

In a large bowl, combine quinoa, chicken, enchilada sauce, green chiles, corn, black beans, cilantro, cumin, chili powder and season with salt and pepper to taste.  Stir in 1/2 of the shredded cheese.  Spread quinoa mixture into the prepared baking dish.  Top with remaining cheese.  Bake until bubbly and cheese has all melted, about 15 minutes.  Serve immediately, topped with diced tomato and more cilantro, if desired. 

(Source: adapted from Damn Delicious)

Print Friendly and PDF

Wednesday, April 23, 2014

Rosemary Lemon Crock Pot Chicken

So it was just Easter weekend, my mother-in-law was visiting and my oven decided to go caput.  Can you even imagine?  I mean, a blogger with no oven?  I am going through serious withdrawal (it's still not fixed as of right now).  But that wasn't even the worst part.  How was I suppose to cook Easter dinner??


We thought about grilling something, anything, but our Easter dinner typically consists of turkey, mashed potatoes, gravy, veggies (very similar to Thanksgiving because I don't eat ham).  Then, it hit me...my Crock Pot!  And thank goodness for Pinterest because I had already pinned a couple of roast chicken Crock Pot recipes.  After glancing over them to check times and heat temperatures, I came up with this rosemary lemon chicken.  


Lemons, inside and out, plus a rosemary, garlic and zesty salt blend rub make this chicken absolutely incredible.  Not only does the chicken become so tender that it just falls apart, but there is enough juice leftover to make gravy.  The breast completely separated from the legs and wings as I was lifting it out of the Crock Pot, which was perfect because it was less carving we had to do.  I am hooked on roasting chicken in the Crock Pot!

 Serves 6

Rosemary Lemon Crock Pot Chicken

1 (4-5 pound) roasting chicken
3 lemons
2 tablespoons dried chopped rosemary
1 tablespoon salt-free zesty seasoning blend (like Mrs. Dash)
2 teaspoons minced garlic
2 tablespoons olive oil 

For the gravy
4 tablespoons unsalted butter
1/2 cup flour
chicken drippings from bottom of Crock Pot
1 cup reduced sodium chicken broth, or more as needed

In a small bowl, combine the rosemary, garlic, salt blend, then add olive oil to make a paste (start with 1 tablespoon and add more as needed).  Set aside.  Spray the inside of the Crock Pot with non-stick cooking spray and turn heat to high.  Cut a tiny bit off of the end of 2 lemons (so you have a flatter surface - you'll be setting the chicken on top of these so they need to be sturdy and not rolling around) and slice in half.  Set the 4 pieces on the bottom of the Crock Pot, with the insides of the lemons facing up.  

Remove the chicken giblets.  Rinse the chicken inside and out and pat dry.  Rub the rosemary garlic paste all of the chicken, including the inside.  Cut the remaining lemon into quarters and stuff inside chicken.  

Set the chicken on top of the lemon halves and cover with Crock Pot lid.  Cook on high for 3 1/2 - 4 hours or until the pop up timer pops up.  Remove chicken, set on cutting board and cover with foil for about 10 minutes.  Meanwhile, make the gravy.      

To make the gravy:  in a medium saucepan, heat butter over medium heat until melted.  Whisk in the flour and cook for about a minute to make a roux.  Place a mesh strainer over the saucepan and start ladling the chicken drippings from the bottom of the Crock Pot through the strainer.  Whisk occasionally to combine the flour mixture with the drippings.  It will start to thicken, then slowly add in the chicken broth, whisking the whole time.  Cook until thickened and bubbly, add more chicken broth to thin out if needed.  Check for seasoning and add salt and pepper to taste.

Print Friendly and PDF

Monday, March 31, 2014

Chicken and Egg Noodle Casserole

Comfort food at it's best!  Warm and inviting and perfect for feeding a crowd.  Veggies, egg noodles and cheese - what's not to love?  


Packed with flavor from chicken broth, white wine, carrots, onions and celery, then combined with half & half makes this dish so creamy and delicious.  You can make it easier on yourself by purchasing a rotisserie chicken, rather than cooking and shredding the meat yourself.  I used a very simple pan steam method to cook my chicken - about an inch of water in a deep skillet, bring to a boil, add 2 chicken breasts and cover for about 20 minutes (depending on how thick the chicken is).  Shred and add to recipe.   


As if the noodle, veggie and white wine mixture wasn't enough, the casserole then gets topped with shredded mozzarella.  Baked until bubbly and the edges get a crispy cheesy crust - remember what I was saying about comfort food?!  This is sure to be a hit with your whole family.

Serves 8

Chicken and Egg Noodle Casserole

4 tablespoons butter
12 ounces egg noodles
1/3 cup flour
1/2 cup diced onion
1 medium carrot, diced
1 large stalk of celery, diced
1/2 cup dry white wine
4 cups reduced sodium chicken broth
1 cup half & half
2 cups cooked, shredded chicken
1 cup shredded mozzarella

Preheat the oven to 375 degrees and grease a 3-quart casserole dish (or a 9 x 13-inch baking pan) with non-stick cooking spray.  Bring a large pot of salted water to a boil and cook the egg noodles until al dente, about 4 minutes.  Strain.

While the noodles are cooking, heat the butter in a heavy bottom pot over medium heat.  Whisk in the flour to form a paste.  Stir in the onions, carrots and celery and season with 1/2 teaspoon salt and 1/4 teaspoon pepper.  Cook 5 minutes to soften, then add the wine.  Whisk for 30 seconds, then add the chicken broth and heavy cream.  Bring to a boil, reduce heat and simmer for 10 minutes.

Fold in the noodles and chicken and season with salt and pepper to taste.  Transfer to the greased casserole dish and top with the shredded mozzarella.  Bake until bubbly and brown on top, 40-45 minutes.

(Source:  Adapted from Food Network)

Print Friendly and PDF

Friday, March 14, 2014

Layered Chicken Taco Salad

I had been in the mood for tacos, but kept forgetting to buy hard taco shells at the store!  So I used some of my regular fix-ins' for tacos - cheese, lettuce and tomatoes and turned it into a layered salad...or dip?  This dinner came together in no time at all.   


We ate this by scooping it up with tortilla chips even though I had added seasoned tortilla strips to the top of the salad (you can usually find them in the aisle with the croutons).  Which is why I thought of it as a dip or a salad.  I used chicken because I don't eat ground beef, but you can very easily substitute it.  I also tossed in the black beans to cook a bit with the chicken when I added the taco seasoning.    


This is a great dish to customize to your family - choose a different meat or add other toppings such as black olives or chopped green pepper.  We also would have topped it with sour cream and salsa, but I didn't have either of those on hand - and now you can see how desperate I was to have tacos even though I didn't really have all of my usual suspects for the toppings!  I'll chalk that up to another pregnancy craving...  

Serves 4

Layered Chicken Taco Salad

2 tablespoons olive oil
2 boneless, skinless chicken breasts, diced
1 cup black beans, drained and rinsed
3 tablespoons taco seasoning
3/4 cup water
1 head of Romaine lettuce, chopped
2 Roma tomatoes, seeded and diced
1 1/2 cups shredded Mexican blend cheese
1 cup Santa Fe tortilla strips (optional)
sour cream and salsa (optional)

In a medium skillet over medium, heat the olive oil and add diced chicken.  Cook until browned, add the black beans, taco seasoning and water.  Simmer for about 10 minutes until sauce is slightly thickened.  Spoon chicken and black bean mixture onto the bottom of a 9 x 13-inch pan.  

Top chicken with lettuce, followed by tomatoes, cheese and tortilla strips.  Dish out to individual plates or bowls (or scoop right out of the pan with a tortilla chip!).  Serve with sour cream and salsa if desired. 

Print Friendly and PDF

Friday, February 7, 2014

Barbecue Chicken Quesadillas

This is one of our favorite weeknight dinners.  So easy and everyone in my family gobbles it up!  There's some spice to it, so if you're serving it to your kiddos as well, you may want to omit the jalapenos and customize it to their taste.


But, that's what's awesome about quesadillas - you can make them any way you like them!  I used McCormick's Montreal steak spicy grill seasoning to season the chicken - tons of flavor and I like the spice.  The cheese I used is a blend of Mexican cheeses and taco seasoning.  Use your go-to seasoning for chicken (even taco seasoning on the chicken would be great) and whatever cheese you love.
  

I make my own salsa a LOT.  My husband can't get enough of it!  You can get the recipe here, or just use your favorite store brand.  

I wrote this recipe for 2 quesadillas, but you'll probably have enough chicken to do another 1/2 (just use one tortilla and fold it over).  I don't like a ton of chicken on mine, so I use less than my portion, then make a smaller one for the kids!     

Serves 2-3 

Barbecue Chicken Quesadillas

1 large boneless, skinless chicken breast, diced
olive oil
1 tablespoon Montreal steak spicy grill seasoning
1/2 cup barbecue sauce, plus more for drizzling
4 flour tortillas (soft taco size)
2 cups shredded Mexican blend cheese
2 tablespoons diced jalapenos
1 tablespoon chopped fresh cilantro

In a skillet over medium, heat olive oil until it starts to ripple, then add chicken.  Sprinkle the grill seasoning over the chicken and cook until done throughout.  Remove from heat and stir in the 1/2 cup of barbecue sauce.  Set aside.

Preheat quesadilla maker or a large skillet (if using a pan on the stove, you'll need to brush each side of the tortillas with olive oil or vegetable oil and spray the skillet with non-stick spray).  On one tortilla, sprinkle about 1/2 cup cheese.  Top with 1/2 of the chicken, 1 tablespoon of jalapenos and 1/2 tablespoon cilantro.  Top with another 1/2 cup of cheese and then drizzle more barbecue sauce (to taste).  Top with another flour tortilla.  Repeat to make the other quesadilla.

Place assembled quesadilla onto the quesadilla maker and close lid.  Cook until cheese is melted and top is golden brown, about 4-5 minutes.  If using the stove, cook for a couple minutes on one side, until the cheese starts to melt and the tortilla turns golden, then flip to heat the other side.

Serve with salsa and other favorite toppings.  

Print Friendly and PDF

Wednesday, January 15, 2014

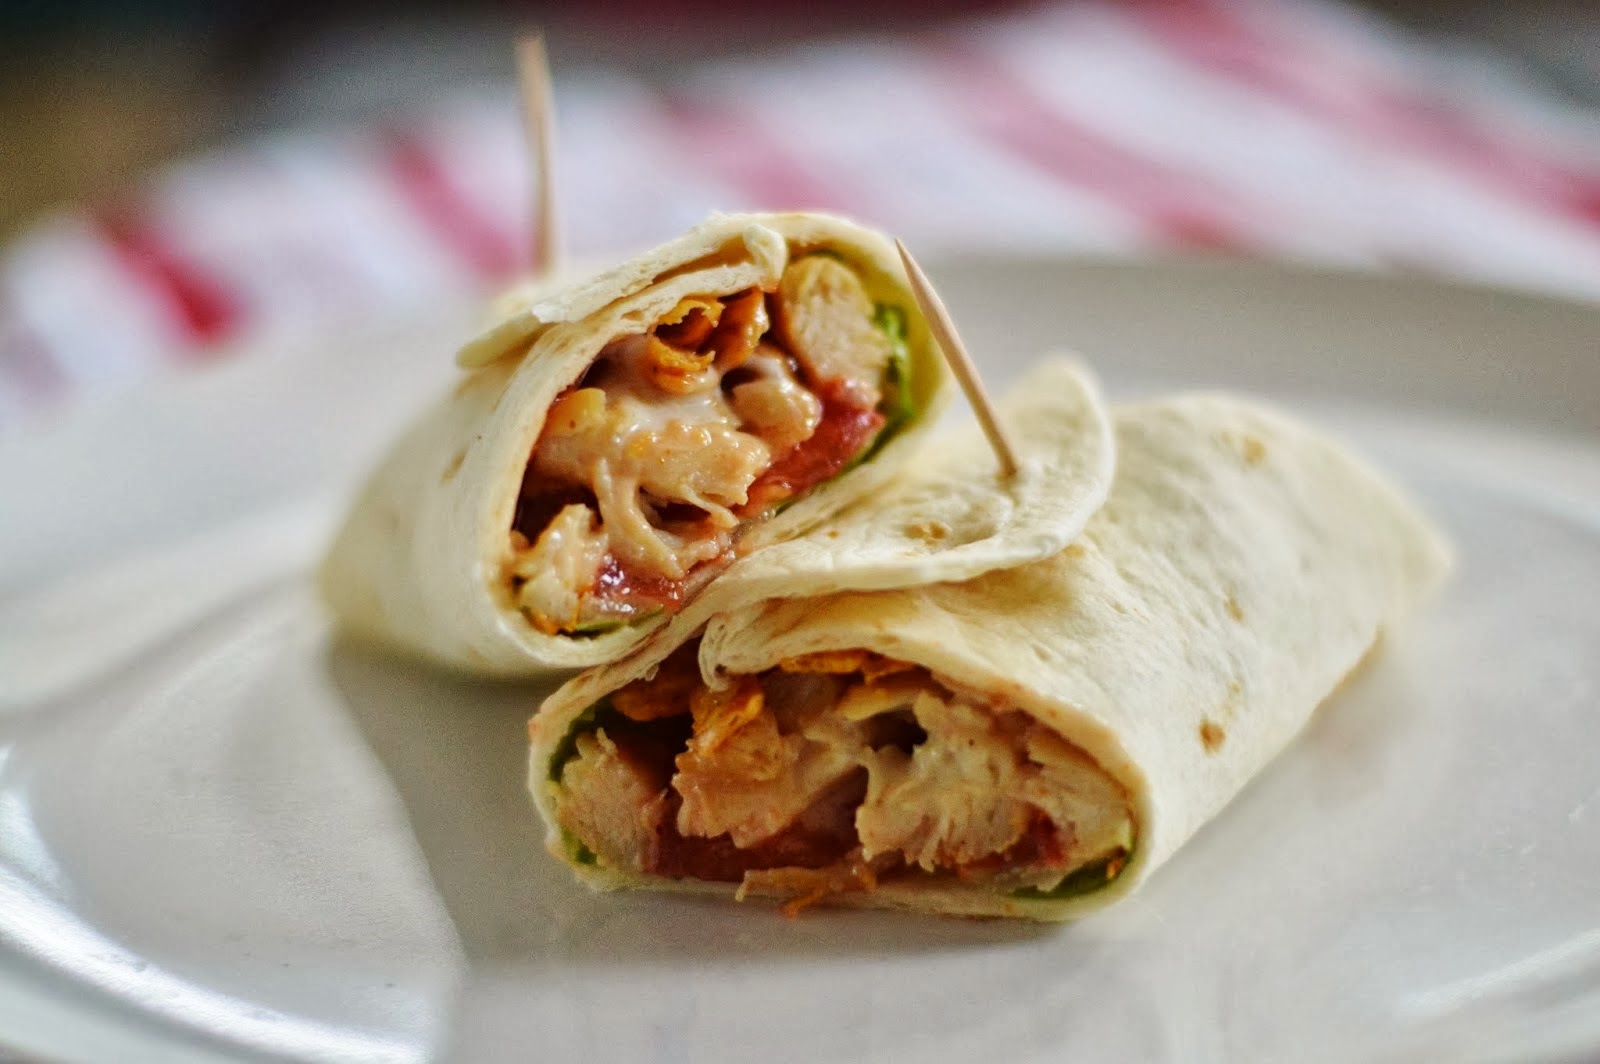
Barbecue Ranch Chicken Wraps

This was a weekend creation that started with my husband wanting a wrap for lunch.  You know, something a little more substantial than our normal pb & j (as much as I cook, my kids live off of them during the week!).  He diced and cooked the chicken with a little seasoning salt and grill seasoning and I got the veggies ready. 


I've had quite a few barbecue chicken wraps at different restaurants so when we asked what else I wanted on it, I immediately thought Ranch dressing and barbecue sauce.  Instead of cheese to keep it a bit lighter, I topped it all with Santa Fe tortilla strips that I normally use on my salads (found with the croutons in the grocery store).  Oh my goodness...talk about lick your fingers good!

Makes 4 wraps

Barbecue Ranch Chicken Wraps

2 boneless, skinless chicken breasts diced
2 tablespoons olive oil
2 teaspoons seasoning salt or grill seasoning (or combination of both)
2 Roma tomatoes, sliced
3-4 leaves Romaine lettuce
4 tablespoons barbecue sauce 
4 tablespoons light ranch dressing
4 tablespoons Santa Fe tortilla strips
4 soft taco size tortillas

Add olive oil to a medium skillet and heat over medium for a couple of minutes.  Add chicken and seasoning and cook until done throughout.  In the meantime, assemble the wraps.

Place the tortillas between two damp paper towels and heat in the microwave for 30 seconds.  In the middle of the wrap, place a couple of pieces of lettuce, topped with 3 or 4 slices of tomatoes.  Top with about 1/3 cup chicken.  Drizzle about 1 tablespoon of the ranch dressing and barbecue sauce (each) over the chicken, topped with about a tablespoon of the tortilla strips.  Roll up and cut if desired. 

Print Friendly and PDF

Friday, November 15, 2013

Easy Chicken Noodle Soup

This soup is my cure-all when my family is feeling icky.  It's the easiest noodle soup you can make - I've even made it for myself when I've been sick.  That's how easy it is!  I have two little ones with coughs and colds, plus it's freezing out, so I decided to whip this up for lunch.  It was done in about 20 minutes.  It's incredibly warm and comforting - add a chicken breast when you add your veggies if you want actual chicken noodle soup.  It will take around twenty minutes to cook (after it starts boiling), then remove, shred and put back in when you stir in the pasta.  Serve with butter crackers or good bread for dipping! 

Serves 4-6

Easy Chicken Noodle Soup

2 quarts reduced sodium chicken broth 
1 chicken bouillon cube
1 cup diced celery
1 cup diced carrots
2 bay leaves
salt and pepper
2 cups dried pasta (I used rotini)

In a large saucepan, combine the chicken broth, bouillon cube, celery, carrots and bay leaf.  Salt and pepper to taste (start with 1/2 teaspoon salt, 1/4 teaspoon pepper).  Turn heat on medium-high, let it come to a boil and simmer for a couple of minutes.  Add the dried pastand cook according to the time on pasta box.  Check for seasoning and serve.  

Tip: If you have leftovers, you may need to add more chicken broth the next time you heat it up - as it sits in the fridge, the pasta really soaks up the broth!

Print Friendly and PDF

Saturday, November 9, 2013

Crock Pot Garlic Chicken

I was looking at a pretty busy day ahead us...school drop-offs, pick-ups, doctor appointments, ballet, you name it!  So I knew it was going to be a Crock Pot day.  This recipe is from Martha Stewart and I did adapt it slightly - I used chicken breasts instead of a whole chicken (easier on me), less onion (because I know my family) and substituted minced garlic instead of just halving whole cloves.  


I served my chicken over mashed potatoes and my husband was even blown away - what resulted was a meal that tasted like I spent hours roasting a chicken, complete with gravy!  Which by the way, is also super simple - made right in the Crock Pot at the very end.  

 Serves 2-3

Crock Pot Garlic Chicken

1/2 onion, thinly sliced
6 cloves garlic, roughly chopped or minced
2 teaspoons dried thyme
salt and pepper
2 large boneless, skinless chicken breasts
1 cup white wine
1/3 cup flour, plus more for gravy
1/2 - 1 cup chicken broth

Spray Crock Pot with non-stick cooking spray.  In the bottom of the Crock Pot, place the onions, garlic and thyme; season with salt and pepper.  Place the chicken breasts on top of bottom layer.  In a small bowl, whisk to combine the wine and flour.  Pour over top of chicken.  Cook on high about 3 1/2 hours (7 hours on low).  Remove chicken and slice (or shred) on a platter.

To make more gravy:  In a small bowl, combine the chicken broth and 1 or 2 tablespoons of flour.  Pour into the bottom of the Crock Pot, whisking to combine the leftover juices with the chicken broth.  Scrape up any brown bits that are stuck the bottom or sides.  Season with more salt and pepper to taste.  Pour some over the plated chicken.  Serve chicken over mashed potatoes with more gravy.

(Source: Adapted from Martha Stewart)

Print Friendly and PDF

Tuesday, October 29, 2013

Crock Pot Buffalo Chicken Sandwiches

 This recipe has become such a staple in our house, I'm surprised I haven't shared it with you yet!  It's too easy - just about effortless.  I actually even use frozen chicken breasts so I don't even have to worry about defrosting.  And Sweet Baby Ray's sauce but I know that Frank's has one too.  


Yummy enough to just eat up with a spoon...or tortilla chip.  We've done that before!  I used a wonderfully doughy sub roll from Publix (love their bakery) with a drizzle of Ranch dressing on top.

Serves 6

Crock Pot Buffalo Chicken Sandwiches

3 large boneless, skinless chicken breasts
1 (12 oz) bottle Buffalo Wing Sauce
1 packet of dry Ranch seasoning
2 tablespoons butter
Ranch dressing, for drizzling

Place chicken breasts on the bottom of the Crock Pot.  Pour wing sauce over chicken breasts, then Ranch packet.  Cook on high for 5-6 hours or low 7-8 hours.

Remove chicken and shred.  Return to Crock Pot, add butter and stir.  Cook on low or warm for another 1/2 hour to allow the chicken to absorb some of the sauce.  Serve on buns or sub rolls with a drizzle of Ranch dressing.
  Print Friendly and PDF

Tuesday, October 22, 2013

Chicken Pot Pie

So this is probably not the Chicken Pot Pie you were thinking...there's not a crust baked on top of this dish.  Where I grew up, in Central Pennsylvania, this is Pot Pie, or more appropriately, Pennsylvania Dutch Pot Pie.  And if you want me to get really technical, "Bott Boi" - which is why we just ended up calling it pot pie.   I can still taste the way my grandmother made it - usually with leftover turkey from a holiday and sometimes with ham (not my favorite).  Creamy and chunky with potatoes, carrots and yummy square-shaped noodles.


This is my very Italian grandma I might add, not a trace of German roots in her!  Just goes to show that it's a PA thing.  And I call these noodles, some may call them dumplings.  I did not use all of the dough that I made.  Just use your best judgement when adding them to the broth.  You know how chunky or not chunky you'll want your soup. 
  

So inviting and comforting looking right?  Perfect for a chilly fall day.  And really very simple!  Serve with good bread for dipping. 

Serves 6-8

Chicken Pot Pie
2 quarts chicken broth
1 quart water
1 large boneless, skinless chicken breast 
2 carrots, peeled and diced
1 rib celery, diced
1/2 medium onion, diced
4 small red potatoes, diced 
2 tablespoons flour added to 2 tablespoons water (for a thickening paste)

For the dough
2 1/2 cups flour
1/2 teaspoon salt 
3 eggs
1 tablespoon cold water

In a large pot or dutch oven, combine the chicken broth, water, chicken breast, carrots, celery, onion and salt and pepper to taste.  Bring to a boil and let simmer until chicken is cooked through.

While that is cooking, make the dough.  Combine everything except for 1/2 cup of flour.  Mix in the remaining 1/2 cup and continue kneading to form a stiff dough, about 10 minutes.  Roll dough on a lightly floured surface to as thin a sheet as possible.  Cut into 2-inch squares.

When chicken is done, remove, shred and return to pot.  Check broth for seasoning; salt and pepper if needed.  Add half of the potatoes, then about half of the dough squares, gently pushing down each layer until covered with broth.  Repeat with remaining potatoes and dough.  Cover and let simmer for about 20 minutes until potatoes and dough are thoroughly cooked.  Stir in the flour paste at this time to thicken the soup (if desired).
   
Print Friendly and PDF

Monday, October 21, 2013

Chicken and Veggie Egg Rolls

I have been dreaming about some sort of egg roll or dumpling with chicken and/or just veggies.  This recipe is exactly what I had envisioned.  Crunchy inside and out with flavors of ginger (I LOVE ginger!), garlic and soy sauce.  


I think you can pretty much use any greens you have on hand for the inside.  I used Romaine!  But, cabbage, kale, even spinach would be good, too.  


Yummy and easy to make - I whipped these up for lunch yesterday in no time!  I would make this filling again and use in wontons to make little fried dumplings.  They would make a fantastic party appetizer.

Makes 6-8 egg rolls 

Chicken and Veggie Egg Rolls

1 large boneless, skinless chicken breast, diced
1/3 cup shredded or diced carrots
1 small shallot, minced
2 tablespoons soy sauce
1 teaspoon minced garlic
1 teaspoon minced ginger
1/2 teaspoon sugar
2 cups greens, roughly chopped (Kale, cabbage, spinach, etc)
6-8 Egg Roll wrappers
vegetable oil, for frying

For the dipping sauce
1/4 cup soy sauce
1-2 teaspoons rice wine vinegar
1 teaspoon minced ginger
1 teaspoon green onion, diced
dash of Sriracha sauce (or more to taste)
dash of sugar

In a large ziplock bag combine the ingredients for the filling up to the greens.  Turn and toss until everything is combined and coated with the soy sauce.  Let sit for 20 to 30 minutes.

In a small bowl, combine the ingredients for the dipping sauce.  Stir well and place in fridge until ready to use.

In a frying pan over medium heat, add a tablespoon of vegetable oil.  Cook the chicken mixture until the chicken is almost cooked throughout.  Add the greens, let wilt and continue cooking until chicken is done.

To make the egg rolls, place one wrapper at a time, like a diamond, on your work surface.  Place about 2 tablespoons of the chicken mixture across the middle.  Roll up the bottom first, tucking in the sides as you roll.  Brush the upper corner with water to seal them.  

In a medium saucepan, heat approximately 3/4 of an inch of oil over medium heat.  Test it by dropping in a small piece of egg roll wrapper - it should sizzle, but not brown too quickly.  Drop egg rolls in, 2 or 3 at a time, turning for 2-3 minutes until all sides are golden brown.  Repeat with remaining egg rolls.  Serve warm with the dipping sauce.

(Source: Adapted from Just a Taste)

Print Friendly and PDF

Sunday, October 6, 2013

Game-day Blackened Chicken Wings

Wings are pretty much perfect football watching food.  These are our favorite way to make wings - on the grill, spicy and crispy.  They take some practice and I'm not the one that typically cooks these...my husband has his method down to a science.  

When we moved to Savannah almost 7 years ago we met a great group that we would always watch college football with.  Our Saturdays were spent drinking and eating good food - there was never a shortage of good food!  Our friends from Louisiana introduced us to this style of wing, and to Tony Chachere's Creole Seasoning.  Which, I can tell you right now that I have 3 jars of it in my cabinet because I'm always afraid I'm going to run out!   


Hot sauce is brushed on the uncooked wings, followed by a generous sprinkling of Tony's.  The wings are cooked on low at first, then the heat is cranked up to blacken them at the very end.  If you can get your grill to flame up, it really helps with the charring.  I like mine really crispy and typically leave the ones I'm eating on for a couple minutes longer than my husbands.

I'm guessing how much hot sauce and seasoning I use for the purpose of writing this recipe.  I would say do a couple of shakes of hot sauce on each side of the wing, with a generous shake of Tony's.  Cover the whole wing with the a nice layer of the spice.  


Blackened, spicy wing perfection!  If you have a favorite sauce, you can add that on at the end but these have such a great flavor that we don't do a sauce or even dip them in anything. 

Makes 24 wings 

Game-Day Blackened Chicken Wings

1 bag of frozen chicken wings (24 count), thawed
1/2 cup Frank's hot sauce
1/4-1/2 cup Tony Chachere's creole seasoning

Preheat grill on high.  Lay the thawed wings on a baking sheet and brush half of the hot sauce evenly onto the top of each wing.  Evenly sprinkle about 1/2 of the seasoning on each wing.  Flip and repeat on the other side.  

Place the wings on the hottest part of the grill and turn to low.  Cook for 5-7 minutes per side until they are pretty much cooked through.  Turn the grill back to high and group the wings onto the hottest part of the grill.  Cook for another couple of minutes to get the outsides crispy and blackened.  If you can get the grill to flame up at this point, it really helps with the charring (sometimes the fat from the wings will cause this and sometimes we spray non-stick cooking spray right on the grill to help it!).  Serve immediately.
  
Print Friendly and PDF

Tuesday, August 27, 2013

Sweet and Spicy Chicken Tenders with Poppy Seed Honey Mustard Sauce

I rarely make fried foods because it causes such a mess in the kitchen.  Also, of course, it's not great for you - but all in moderation, right?  Anyway, I took one look at the Coconut Crunch Chicken Fingers from The Cozy Apron and I knew I had to have them!  Chicken tenders coated with a dusting of flour and a hint of cayenne, then dipped into sweetened coconut flakes.  


I also have weakness for the chicken fingers at Wild Wing Cafe (found mostly in the Southeast but if you ever come across one - you gotta try it! Amazing food!).  Their chicken fingers are served with a honey mustard sauce that is to die for.  It has poppy seeds in it and is so different from any other honey mustard.   


I found a recipe for the sauce on yummmpop and it is pretty much exact.  You have no idea how excited I am to find this!  Poppy seed dressing and honey mustard - and that's it!  So simple, but perfect.  


My daughter, always the helper, trying to show off the chicken fingers dipped in sauce.  Yummy, right??


Sweet and Spicy Chicken Tenders

6-8 cups vegetable oil
2 large chicken breast cutlets
salt, pepper
pinch of cayenne pepper (or more depending on your taste)
1/2 cup flour
2 eggs
2 cups shredded sweetened coconut

Poppy Seed Honey Mustard Sauce*
1/4 cup honey mustard (I used French's)
3/4 cup poppy seed dressing (I used Publix Premium Poppy Seed Dressing)

Fill a medium size pot with the vegetable oil and set between medium and medium high.  Slice the chicken breasts into 4 or 5 slices, then cut those in half again.  Place in a bowl and toss with salt, pepper and a pinch of cayenne.  

Set up your coating station with 3 bowls:  flour, a little salt, pepper and another pinch of cayenne in one bowl.  Beat the eggs in another bowl, and the coconut in the 3rd bowl.  Coat the chicken strips by dipping into the flour first, eggs second and last in the coconut.  Press the strips into the coconut to ensure they are well coated.  Set the strips aside until you are finished with all of them.

Working in batches of about 4-5, drop the strips in the hot oil and fry for about 2 minutes, flipping them occasionally until they are a deep, golden color.  Remove from oil and place on a paper towel lined plate to drain.  Sprinkle with salt and pepper while still hot.  Repeat with the remaining strips.  Serve warm with the poppy seed honey mustard sauce.   

*If you need to make more or less sauce, just remember it's a 1-3 ratio.  

(Source:  Adapted from The Cozy Apron and yummmpop)

Print Friendly and PDF

Monday, July 29, 2013

Crispy Buffalo Chicken Wraps

We have Buffalo chicken wraps for dinner a lot...in fact, we really love anything Buffalo.  Stromboli, dip, wraps, you name it.  And I know we're not alone.  If you're a Buffalo fan, you will LOVE this! 


Start with a burrito size flour tortilla...layer with shredded cheese, chicken tossed in Buffalo wing sauce and top with Ranch!  My mouth is watering just thinking about it...


After the tortillas are rolled up, you give them a little spritz of vegetable spray and cook for just a couple of minutes in a skillet on medium.  This gets them nice and crispy and melts the cheese inside. 

Makes 3-4 wraps

Crispy Buffalo Chicken Wraps

2 large, boneless skinless chicken breast, cut into bite sized cubes
1 tablespoon spicy grill seasoning (I used McCormick)
1 cup of Buffalo wing sauce (I used Sweet Baby Ray's)
3-4 burrito size flour tortillas
1 1/2 cups Mexican blend shredded cheese
1/2 cup ranch dressing

In a medium skillet over medium-high heat, cook the diced chicken tossed with the grill seasoning until cooked throughout.  Once done, remove from heat and toss with Buffalo wing sauce.  Set aside. 

Preheat a large skillet over medium and grab the tortillas.  Sprinkle about 1/2 cup of the shredded cheese on each tortilla, leaving about a 1/2 inch border.  Spoon about 1/4 cup of chicken right down the middle.  Top with a drizzle of ranch dressing.  Fold in the sides of the tortilla, and start rolling the bottom up toward the top.  Spray with vegetable spray and lay seam side down in preheated skillet.  Cook for 1-2 minutes, then flip and cook 1-2 minutes on the other side.  Repeat with other filled tortillas.
Print Friendly and PDF

FREE eCookbook!

Search

My photo
I'm a super busy mom of 3 and a Beachbody coach. Follow along as I try to find a balance between eating good food and keeping my family healthy and happy! We eat mostly clean with a few fun treats thrown in every once in awhile. Thanks for stopping by!

What I'm Pinning...

I'm on Instagram!


Rivit Media
PublisherMunchkin Land Designs
 
Designed by Munchkin Land Designs • Copyright 2012 • All Rights Reserved