Showing posts with label Clean Eating Appetizers dips and sides. Show all posts

Tuesday, November 17, 2015

Roasted Acorn Squash

A few weeks ago we were at our local farmers' market when I saw what I thought were gourds and picked them up because I thought they would make a great fall decoration.  As I was paying, I was informed that what I picked up was an acorn squash and that I needed to EAT it!  So...after a bit of research, I decided to try roasting it.  Even my husband, who was totally unsure, could not stop raving about this roasted acorn squash! 


They really could not be easier to prepare!  Cut in half (ok, yes that is the hard part!! Good knife and a steady hand!), remove the seeds and it's 4 ingredients - butter, coconut sugar, cinnamon and sea salt.  Be prepared because it does take a little over an hour for these to roast. I honestly had no idea they would take that long and they weren't exactly ready when the rest of our dinner was...


Such a great fall side dish!  I served ours with Crock Pot rotisserie chicken.  With the leftovers the next day, I scraped out the squash, then mixed diced chicken together and it was amazing.  Clean eating is fun and does not have to be boring...


Acorn squash is a winter squash and when choosing one, it should feel firm on the outside with no blemishes.  Don't they look pretty even after being roasted?  This dish would be a beautiful side for the Holidays.  And they are a great source of vitamins - A (beta carotene from the orange flesh) and C, also iron and riboflavin.  Enjoy!!


Serves 4
Roasted Acorn Squash

2 small acorn squash, cut in half and seeds removed
4 teaspoons organic butter
4 teaspoons coconut sugar
1 teaspoon cinnamon
sea salt

Preheat oven to 450 degrees.  Assemble acorn squash on a baking sheet. Place 1 teaspoon of butter and coconut sugar in each half.  Add 1/4 teaspoon of cinnamon in each and season with salt.  Bake until golden and tender, about 1 hour to 1 hour 15 minutes, basting flesh of squash several times. Serve warm.

Print Friendly and PDF

Wednesday, September 16, 2015

Roasted Butternut Squash and Brussel Sprout Quinoa Salad

Usually when I get my monthly magazines in the mail, they immediately get tossed one of my (MANY) magazine baskets I have around the house until I have the chance to read them.  For some reason, I was compelled to open this month's Clean Eating magazine right away and there was one salad in there that I immediately had to make.  Their's called for Sorghum, which is a cereal grain, and I didn't have that on hand.  But I did have quinoa...and that's how how this delicious roasted butternut squash and brussel sprout quinoa salad was created!  


I don't know about you, but I'm very ready for fall and the cooler weather.  Does this salad no just scream FALL?  I mean, the colors alone!  It's simply gorgeous!


The squash is roasted in tumeric, and this was my first time using it.  It turns everything yellow FYI! But it's so good and I would roast the squash this way as a side dish in the future.  Tumeric is actually being studied for it ability to prevent or slow the spread of cancer, which is pretty amazing. Definitely a spice I plan on using a lot more...


Serves 4

Roasted Butternut Squash and Brussel Sprout Quinoa Salad

1 cup uncooked quinoa
1 1/4 pound butternut squash, peeled, seeded and cubed
2 tablespoons olive oil, divided
1/2 teaspoon ground tumeric
10-12 Brussel sprouts, trimmed and sliced thin
2 cloves garlic, minced
1 small head radicchio, roughly chopped
sea salt
fresh ground pepper

For the vinaigrette
1/4 cup olive oil
2 tablespoons balsamic vinegar
2 tablespoons fresh orange juice
1 teaspoon pure maple syrup
sea salt and fresh ground pepper

Preheat oven to 325 degrees.  While that heats, cook the quinoa according to the package directions, then set aside.   Add the butternut squash to a large sheet pan and toss with 1 tablespoon oil, 1/2 teaspoon pepper and 1/4 teaspoon salt.  Roast until squash is tender, stirring a couple of times during cooking, about 40 to 50 minutes.

In a large skillet on medium, heat 1 tablespoon olive oil.  Add the Brussel sprouts and 1/4 teaspoon each salt and pepper and cook, stirring occasionally, until they are crisp-tender, 6 to 8 minutes.  Add the garlic during the last minute of cooking, stir until the garlic is fragrant.  Remove from heat.

To make the dressing:  in a medium bowl, whisk the oil, vinegar, orange juice, maple syrup and 1/4 teaspoon each salt and pepper until combined.  In a large bowl, combine the quinoa, squash, Brussel sprouts, radicchio and vinaigrette.  Toss well to combine.  Store leftovers in the fridge.

(Source: adapted from Clean Eating Mag)

Print Friendly and PDF

Wednesday, June 17, 2015

Garlic Roasted Broccoli

I'm always on the hunt for new and interesting ways to prepare veggies.  And ways that my kids will eat their veggies without me having to drown them in some sort of cheese sauce (or bribe them).


So far, the one way that we ALL seem to love our veggies is roasted!  They take on a great flavor, and you can add any spices or seasonings that you like.  My 5-year old gobbled up 3 servings of this broccoli.  Unfortunately, I added a bit too much red pepper flakes for my other two younger ones, but know better for next time! 


Lots of garlic, salt and pepper to taste and red pepper flakes if you like.  Toss with olive oil (the above picture is before they went in the oven).  Is simple and easy and is an awesome side dish for fish or chicken. 
  
Serves 4

Garlic Roasted Broccoli

2 big or 3 smaller heads of broccoli
1/4 cup olive oil
3 cloves of garlic, minced
pinch of red pepper flakes 
sea salt and fresh ground pepper, to taste

Preheat the oven to 425 degrees.  Cut the broccoli florets off of the stalks and cut each one into bite size pieces.  Place the broccoli on a baking sheet large enough to have them in a single layer.  Drizzle with olive oil, sprinkle the garlic, red pepper and salt and pepper over top and mix with your hands until all the broccoli pieces are coated evenly with everything.  Roast for 20-25 minutes or until they are crisp-tender and some of the florets are browned.  Serve immediately. 

Print Friendly and PDF

Monday, June 1, 2015

Tzatziki

This to me is the freshest of fresh tasting dips!  I think it's the cucumbers - really just reminds me of summertime.  Plus, I got them from my local farmers' market so I think that makes it all the more fresh tasting.  


Yes, I was dipping cucumbers in my tzatziki!  I couldn't help myself.  It was so good.  I served this with another recipe that is coming up soon - Crock Pot Chicken Gyros.  Tender chicken, slow cooked with lemon juice, red wine vinegar, garlic, red onion - oh my!  The cool tzatziki went so well with it!!


If you are using regular plain yogurt, you will have to allow several hours to strain it - really to get it to about the thickness of Greek yogurt.  So, I just used Greek yogurt.  No waiting!  This actually freezes really well too.  Just place in the fridge overnight to defrost the day before you plan on using. 

Makes about 3 cups

Tzatziki

32 ounces plain Greek or regular yogurt
2 medium cucumbers, peeled and seeded
3 cloves of garlic, crushed
2 teaspoons red wine vinegar
1 teaspoon fresh lemon juice
1/2 teaspoon dried dill weed
salt and pepper to taste

Strain yogurt using a cheesecloth over a bowl (coffee filter will work too) for a couple of hours or overnight to get out as much moisture as possible.  If using Greek yogurt, you can omit this step.  

Shred or grate the cucumbers (I used the shredder attachment on my food processor) and blot them with a paper tower or clean kitchen towel to get rid of as much moisture as possible.

In a food processor (or mix by hand), combine the yogurt, shredded cucumbers, garlic, vinegar and lemon juice.  Pulse on low until just combined.  Salt and pepper to taste.  Keep in the fridge for at least 30 minutes to allow the flavors to come together.  Store leftovers in fridge or freezer and always serve cold.  

Print Friendly and PDF

Friday, May 29, 2015

Simple Grilled Eggplant

I didn'tstart cooking with eggplant until about 3 weeks ago.  I remember one time I tried to make it years ago and it was mushy and just...yuck.  But I've learned a few things since then and thought I'd revisit it.  Now my husband and I are kind of obsessed...


So far, I've made Eggplant Parm (recipe coming!) twice and we have grilled AND roasted it.  Yes, all in 3 weeks.  Obsessed!  We love it.  My one-year old also loves it.  My 3 and 5-year olds?  Not so much...but I've tried!  


One of the tricks I've learned is that you really should draw out the moisture before preparing.  See instructions below, but you will not believe how much water comes out of an eggplant!  Your paper towels will be soaked.  Also, because I am salting them previously, even with a rinse, I either VERY lightly salt them or not at all right before preparing.  You can over due the salt so just watch out.

I hope you start to like eggplant as much as me if you haven't really tried it before.  This is a very simple dish, but is a perfect summer side!

Serves 3-4 

Simple Grilled Eggplant

1 large eggplant
2 tablespoons sea salt
1/3 cup olive oil
fresh ground pepper

Slice the eggplant into 1/2 inch rounds.  Place slices on a baking sheet lined with paper towels.  Sprinkle the eggplant rounds evenly with the salt and let sit for 30 minutes to an hour.  This will draw out the moisture.  Quickly rinse and pat dry.

Preheat grill to medium high heat.  Brush one side of the eggplant with oil and salt and pepper to taste.  Repeat on other side.  Grill on one side until grill marks appear, then flip and grill until eggplant is tender; total time about 5 minutes.  Serve immediately.   Print Friendly and PDF

Monday, April 27, 2015

Tomato, Cucumber and Red Onion Salad

I first made this salad just last week, have since made it again and plan on making it again this week!  I'm a little obsessed.  And it's not even summertime yet so I know the tomatoes are just going to get better and better.  


We are lucky here in Savannah.  Because it's so warm, our local farmers' market opens in March AND it's within walking distance to from our neighborhood!  We try to go every week - it's fun and happening and the kids love it!  At any rate, I had some really pretty tomatoes and cucumbers that I wanted to do something with, so I whipped this up as a side for dinner one night. 


The dressing is tangy, but sweet because of the honey.  It's ridiculously good.  I never would have thought to give it to my 1-year old, but I think it looked so pretty that she wanted to try.  She kept pointing at and little by little, finished off what was left of the salad.  Good for her!  She is definitely my good eater.  So go ahead, give it a whirl...especially if you have the opportunity to pick some really fresh and fabulous produce!    

Serves 4

Tomato, Cucumber and Red Onion Salad

2 medium tomatoes, seeded and chopped
1 medium cucumber, peeled, seeded and chopped
2 tablespoons red onion, diced

For the dressing
3 tablespoons olive oil
2 tablespoons red wine vinegar
1 teaspoon Italian seasoning
1 teaspoon honey
Pinch of salt

Combine the tomatoes, cucumbers and red onion in a medium bowl.  Whisk the ingredients for the dressing together and pour over the veggies.  Toss everything together.  Chill in the fridge for at least 30 minutes before serving.

Print Friendly and PDF

Tuesday, March 31, 2015

Microwave Sweet and Spicy Sweet Potato Chips

We eat sweet potatoes a LOT.  Really, a couple of times a week for sure.  And I pretty much always prepare them the same way.  Very simply - roasted with just a little salt and pepper.  Delicious, but I was bored of it!


I remembered seeing on Pinterest a recipe about making sweet potato chips - in the microwave!  I think I was more intrigued than anything.  I honestly was a bit skeptical.  Hard to believe that something could get crispy out of the microwave!  But it works - and they are so good! 
  

I'm totally on a sweet and spicy kick lately.  I actually made maple and cayenne roasted Brussel Sprouts the other night that were out of this world!  Will be posting those soon.  These had a very similar flavor - maple and cayenne but I also added some chili powder.  As you can see in my picture, I cut these with my knife.  My next kitchen gadget purchase?  Definitely a mandoline.  I foresee that I will be making these a lot more and that would make my life SO much easier.  Plus, then all the pieces are the same size, and they cook evenly, etc...     

Serves 2

Microwave Sweet and Spicy Sweet Potato Chips

1 large sweet potato, scrubbed clean
1 tablespoon olive oil
1 tablespoon maple syrup
1 teaspoon chili powder
1/2 teaspoon sea salt
1/4 teaspoon cayenne pepper

Cut of the ends of the sweet potato and slice as thin as you can get them with your knife or on the thinnest setting on a mandoline (recommended).  Add the potatoes and all of the ingredients in a large bowl and toss with your hands.

Line the tray of your microwave with parchment paper and place the coated sweet potatoes in a single layer on the tray.  Microwave on high 4-5 minutes or until the ends start to curl up and get crispy.  If you used a knife and have some thicker pieces, these may need to remain in the microwave a little longer to ensure the middle of the chips are cooked.

Repeat with any remaining slices until all chips are cooked.  Sprinkle with additional sea salt if desired and serve warm.  I noticed they crisped up a bit more after sitting for a minute after being cooked.

Print Friendly and PDF

Monday, March 9, 2015

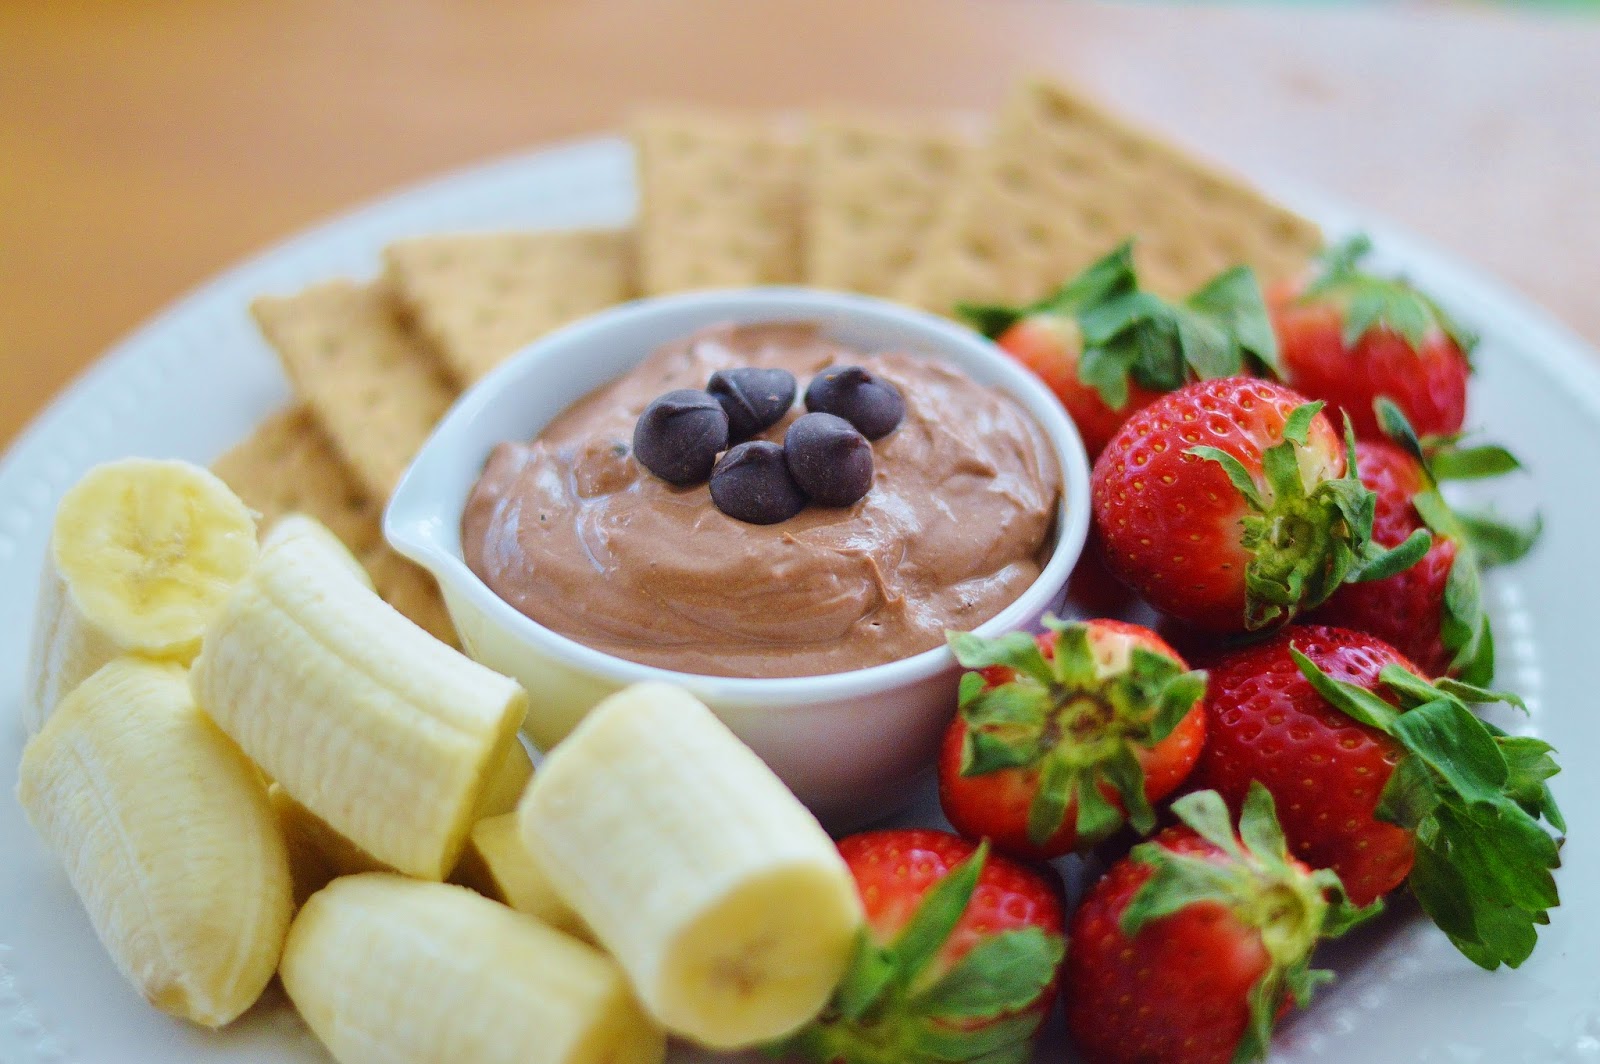
Greek Yogurt Chocolate Peanut Butter Fruit Dip

A couple of weeks ago, Chobani reached out to me and asked to come up with a recipe for their #MadeWithChobani project.  I ended up coming up with two - these Double Chocolate Chip Muffins and this dip.    


This is like a grown-up version of those very sweet cream cheese fruit dips with tons of confectioner's sugar.  Play around with the maple syrup or you can even add a tiny bit of Stevia to make it as sweet as you like it.  And remember that you'll have lots of sweet things to dip in it!


So many options for dipping!  Any fruit, graham crackers, pretzels, etc.  We loved the strawberries with it - like chocolate covered strawberries only better for you!  The addition of the chocolate chips is completely optional, but it was fun having that little bite of chocolaty crunch throughout. 

Makes about 1 1/2

Greek Yogurt Chocolate Peanut Butter Fruit Dip

1 cup nonfat Greek yogurt
1/4 cup pure maple syrup
3-4 tablespoons cocoa powder
2 tablespoons peanut butter
1 teaspoon vanilla extract
3-4 tablespoons dark chocolate chips (optional)

Mix all the ingredients, saving about a sprinkle of chocolate chips for garnish (if desired).  Add more maple syrup or stevia to taste.  Chill in the fridge until ready to serve.  Store leftovers covered the fridge.

Print Friendly and PDF

Wednesday, January 14, 2015

Spicy Roasted Chickpeas

Such a yummy (and healthy!) snack!  And well, truth be told, addicting is what they really are...


Teeny tiny bites with HUGE flavor!  Spicy but not too spicy.  If you don't have ancho chili powder, regular would be just fine.  Also, mine weren't all completely crispy - so don't worry, they won't get as hard as say, a nut.  They will toast and become golden and be absolutely delicious.


 They keep for a while - up to 2 weeks, but I highly doubt they will last that long!  Easily doubled if you are having company or a party.

Serves 4


Spicy Roasted Chickpeas

1 (15 oz) can chickpeas, drained and rinsed
1 tablespoon olive oil
1 teaspoon ancho chili powder
1 teaspoon cumin 
1/2 teaspoon sea salt

Preheat oven to 425 degrees.  In a medium bowl, combine the chickpeas, oil and seasoning until well coated.  Spread on a rimmed baking sheet and bake for 25 minutes, stirring occasionally, until they are golden and slightly crispy.  Let cool completely and store in an airtight container up to 2 weeks.  

Print Friendly and PDF

Monday, January 5, 2015

Zucchini Parmesan Crisps

If you struggle to get your kids to eat their veggies, these are a must try!  They are crisp and salty and so flavorful...they will never know they are getting something that's good for them.  


It is nearly impossible to stop eating these.  This recipe SHOULD serve 4, unless you realize they are so good that you and your husband just gooble them up right off the sheet tray after they come out of the oven!  Seriously, I didn't even get to serve them.  


Next time you are looking for a quick and easy veggie side dish, try these!  And report back - I would love to hear if your kiddos enjoyed them!

Serves 4

Zucchini Parmesan Crisps

2 medium-size zucchinis
1/4 cup fresh grated parmesan cheese
1/4 whole wheat italian seasoned bread crumbs
1 tablespoon olive oil
sea salt and ground pepper

Preheat oven to 400 degrees and spray 2 baking sheets with non-stick cooking spray.  Slice the zucchini into 1/4-inch rounds and in a medium bowl, toss with the the olive oil.  

In a wide bowl, combine the parmesan, bread crumbs and salt and pepper to taste.  Dip the zucchini rounds into the mixture, coating both sides, pressing to stick.  Arrange evenly on the baking sheets.  

Sprinkle the remaining cheese mixture evenly over the zucchini.  Bake for about 25 minutes or until golden brown.  

(Source:  adapted from Blackjack Bake House)   


Print Friendly and PDF

Wednesday, October 22, 2014

Roasted Red Pepper Hummus

Hummus to me is always just one of those things that I never imagined I would ever make.  I mean store bought is delicious, and I always buy a really good-for-you organic brand so what's the point?  Ok, so that was before I looked at how EASY it was to make and before I tasted what was the best hummus I have ever had!!


The taste is different than store bought, better - fresher.  And there are so many different ways to make it that I can't wait to make more and experiment!  Roasted red pepper has always been my favorite so that's what I decided to start with.  This recipe makes a TON.  If you are not serving it for a party, might I suggest halving it - it only keeps for about 5 days in the fridge (and this recipe yields 3 cups). 


Canned organic chickpeas.  Jarred roasted red peppers.  Tahini paste, which is not as unusual an ingredient as you might think it is.  I found it in my organic section of my grocery store next to soy sauce and other sauces.  Not nearly as daunting a task as I thought it would be!  Seriously easy, folks!!  I would not lead you astray!    

Yields 3 cups

Roasted Red Pepper Hummus

1/2 cup tahini paste
1/4 olive oil
2 (14 ounce) cans chickpeas, drained and rinsed
1 1/2 cups jarred roasted red peppers, rinsed and patted dry
1 clove garlic, minced
1 teaspoon salt
1/4 teaspoon cayenne pepper (or more/less to taste)
3 tablespoons fresh lemon juice
cilantro (optional)

Whisk the tahini paste and olive oil together in a small pourable measuring cup.  Set aside.

Process the chickpeas, red peppers, garlic, salt and cayenne in a food processor until almost completely ground.  Scraping down the sides of the bowl as needed.  With the machine running, add the lemon juice and process for 1 minute.  Scrape down the sides of the bowl, then begin processing again, slowly adding the tahini mixture.  Continue processing until the hummus is smooth and creamy.  Garnish with additional chopped red peppers and cilantro if desired.  

Store in an airtight container in the fridge for up to 5 days. 

(Source:  adapted from Brown Eyed Baker)

Print Friendly and PDF

FREE eCookbook!

Search

My photo
I'm a super busy mom of 3 and a Beachbody coach. Follow along as I try to find a balance between eating good food and keeping my family healthy and happy! We eat mostly clean with a few fun treats thrown in every once in awhile. Thanks for stopping by!

What I'm Pinning...

I'm on Instagram!


Rivit Media
PublisherMunchkin Land Designs
 
Designed by Munchkin Land Designs • Copyright 2012 • All Rights Reserved