Showing posts with label tomatoes. Show all posts

Friday, March 14, 2014

Layered Chicken Taco Salad

I had been in the mood for tacos, but kept forgetting to buy hard taco shells at the store!  So I used some of my regular fix-ins' for tacos - cheese, lettuce and tomatoes and turned it into a layered salad...or dip?  This dinner came together in no time at all.   


We ate this by scooping it up with tortilla chips even though I had added seasoned tortilla strips to the top of the salad (you can usually find them in the aisle with the croutons).  Which is why I thought of it as a dip or a salad.  I used chicken because I don't eat ground beef, but you can very easily substitute it.  I also tossed in the black beans to cook a bit with the chicken when I added the taco seasoning.    


This is a great dish to customize to your family - choose a different meat or add other toppings such as black olives or chopped green pepper.  We also would have topped it with sour cream and salsa, but I didn't have either of those on hand - and now you can see how desperate I was to have tacos even though I didn't really have all of my usual suspects for the toppings!  I'll chalk that up to another pregnancy craving...  

Serves 4

Layered Chicken Taco Salad

2 tablespoons olive oil
2 boneless, skinless chicken breasts, diced
1 cup black beans, drained and rinsed
3 tablespoons taco seasoning
3/4 cup water
1 head of Romaine lettuce, chopped
2 Roma tomatoes, seeded and diced
1 1/2 cups shredded Mexican blend cheese
1 cup Santa Fe tortilla strips (optional)
sour cream and salsa (optional)

In a medium skillet over medium, heat the olive oil and add diced chicken.  Cook until browned, add the black beans, taco seasoning and water.  Simmer for about 10 minutes until sauce is slightly thickened.  Spoon chicken and black bean mixture onto the bottom of a 9 x 13-inch pan.  

Top chicken with lettuce, followed by tomatoes, cheese and tortilla strips.  Dish out to individual plates or bowls (or scoop right out of the pan with a tortilla chip!).  Serve with sour cream and salsa if desired. 

Print Friendly and PDF

Friday, March 7, 2014

Veggie Ranch Pizza

Pregnancy cravings are funny.  I haven't made this pizza in ages and it randomly popped in my head one day.  Of course, I had to have it!  It didn't disappoint, I was a happy girl.  


It also made me think of my best friend in high school - we would make this all the time then watch cheesy movies.  Like the cheesiest - Cry Baby?  With Johnny Depp?  It's absolutely terrible but still a favorite of mine to this day! 

Like regular pizza, you can add your own favorite toppings.  I was going to add cucumbers but the one I bought had gone bad in just a couple of days.  So a bit of a bummer there, but I really didn't miss it.  Green peppers, grape instead of Roma tomatoes, green onions...add anything you like. 


I wrote the recipe using reduced fat cream cheese and crescent rolls.  It's just what I always buy, but it's not necessary.  Use what you would normally buy, it won't affect the recipe.  By the way, this is kid approved!  My 4-year old loves it - just like eating broccoli and carrots dipped in ranch which is one of her favorite snacks.  

Serves 6 

Veggie Ranch Pizza

1 tube of reduced fat crescent rolls
1 (8 oz) bar neufchatel cheese
1/2 packet Ranch dressing seasoning mix
1 cup broccoli florets, diced
1/2 cup shredded carrots
1 Roma tomato, diced

Preheat oven to 350 degrees and spray a 9 x 13-inch baking sheet with non-stick cooking spray.  Unroll the crescents onto the pan and use your fingers to spread over the entire pan and seal the seams.  Bake for 14-16 minutes until golden.  Let cool completely.

Mix the cream cheese and Ranch seasoning until combined.  Spread over cooled crescent crust.  Top with veggies (any order).  Chill in the fridge for about 2 hours before serving; cut into 12 squares.  Store leftovers covered in the fridge.    

Print Friendly and PDF

Wednesday, January 15, 2014

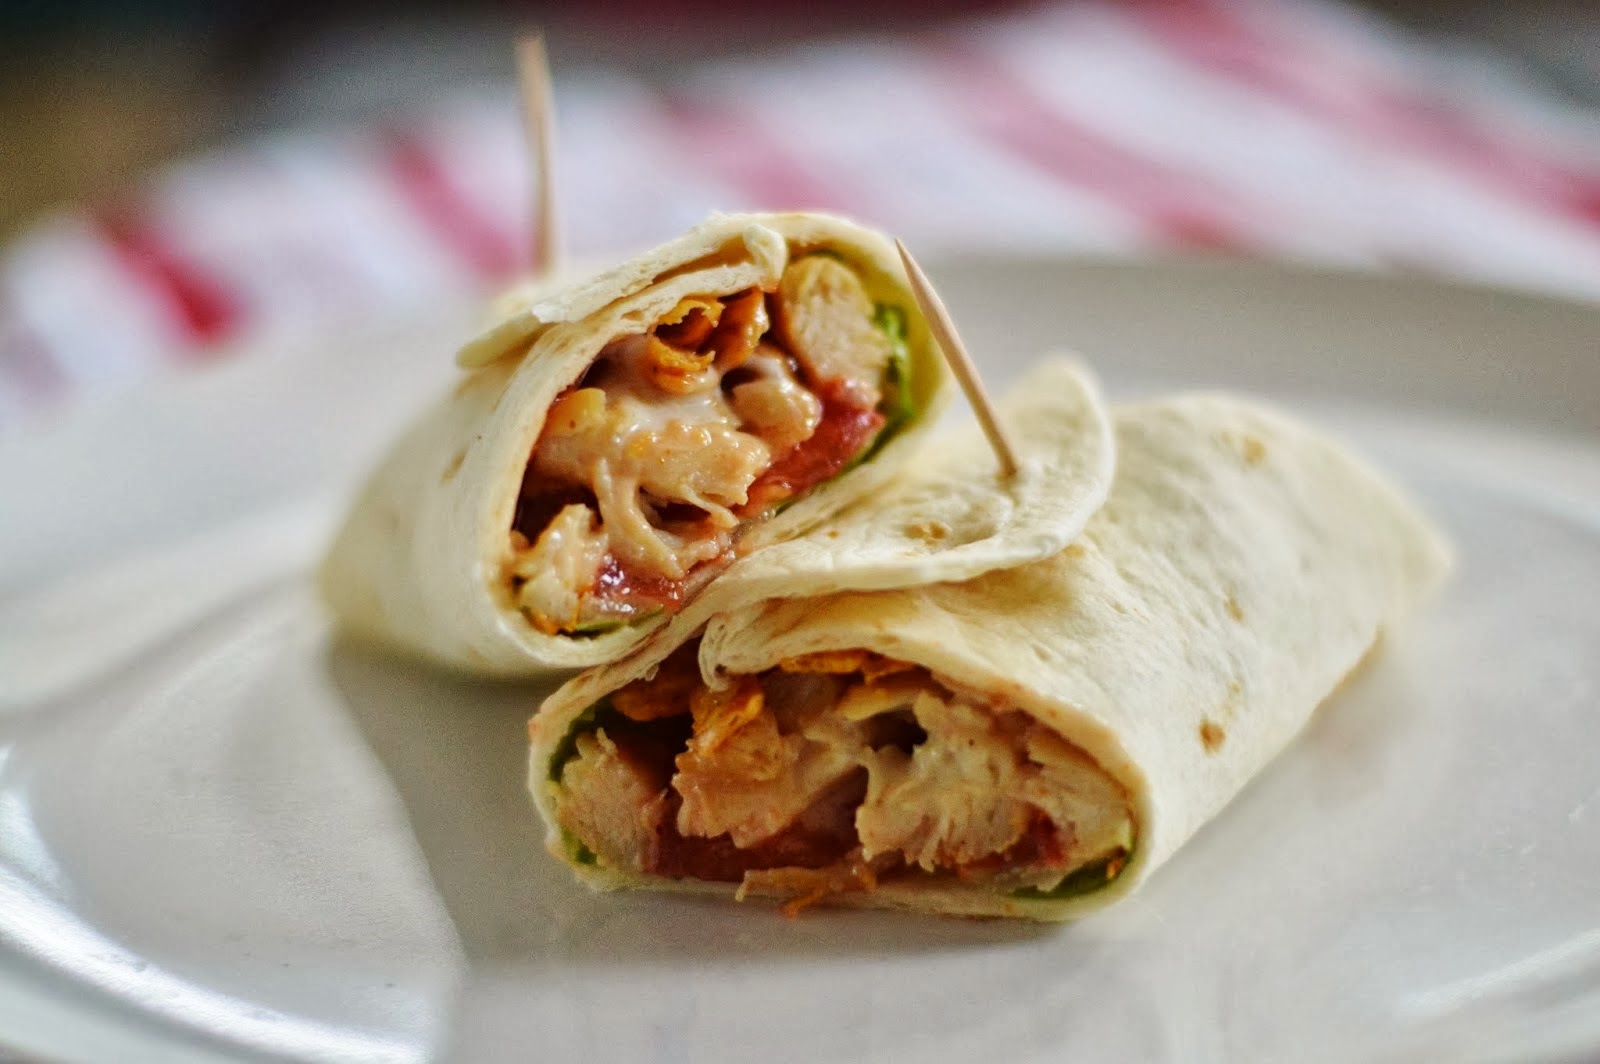
Barbecue Ranch Chicken Wraps

This was a weekend creation that started with my husband wanting a wrap for lunch.  You know, something a little more substantial than our normal pb & j (as much as I cook, my kids live off of them during the week!).  He diced and cooked the chicken with a little seasoning salt and grill seasoning and I got the veggies ready. 


I've had quite a few barbecue chicken wraps at different restaurants so when we asked what else I wanted on it, I immediately thought Ranch dressing and barbecue sauce.  Instead of cheese to keep it a bit lighter, I topped it all with Santa Fe tortilla strips that I normally use on my salads (found with the croutons in the grocery store).  Oh my goodness...talk about lick your fingers good!

Makes 4 wraps

Barbecue Ranch Chicken Wraps

2 boneless, skinless chicken breasts diced
2 tablespoons olive oil
2 teaspoons seasoning salt or grill seasoning (or combination of both)
2 Roma tomatoes, sliced
3-4 leaves Romaine lettuce
4 tablespoons barbecue sauce 
4 tablespoons light ranch dressing
4 tablespoons Santa Fe tortilla strips
4 soft taco size tortillas

Add olive oil to a medium skillet and heat over medium for a couple of minutes.  Add chicken and seasoning and cook until done throughout.  In the meantime, assemble the wraps.

Place the tortillas between two damp paper towels and heat in the microwave for 30 seconds.  In the middle of the wrap, place a couple of pieces of lettuce, topped with 3 or 4 slices of tomatoes.  Top with about 1/3 cup chicken.  Drizzle about 1 tablespoon of the ranch dressing and barbecue sauce (each) over the chicken, topped with about a tablespoon of the tortilla strips.  Roll up and cut if desired. 

Print Friendly and PDF

Friday, October 4, 2013

Parmesan Pesto Roasted Tomatoes

Well, these are just about the best appetizer I have ever eaten.  Seriously...I mean, just look at the pictures.  Not only do these tomatoes taste amazing, they look beautiful, too.  I could've plated them on a nice platter, but to be honest, they didn't last that long.  My husband and I were eating them right off the baking sheet - we had to restrain ourselves long enough for me to take the pictures...and that was LONG enough.


Slice the tomatoes and sprinkle with olive oil, oregano, salt and pepper.  Gorgeous already. 


Roasted tomatoes are so good on their own too.  So great for a caprese salad...but it gets better!  


Adapted from Ina Garten, so you know they are going to be good.  Double it if you're having company.  The pesto I used was her recipe, too.  I made it awhile ago and had it in the freezer.  Here is the recipe - super simple and freezes so nicely to use again and again.  Family - plan on having these as an appetizer at our next holiday!

Serves 4 (but really it's 2 because you won't be able to stop eating them)

Parmesan Pesto Roasted Tomatoes

2 Roma tomatoes, sliced 1/2 inch thick
1 tablespoon olive oil
1 teaspoon dried oregano
kosher salt and fresh ground pepper
1/4 cup pesto (store bought or homemade)   
1/4 cup grated Parmesan cheese  

Preheat the oven to 425 degrees.  Arrange the tomato slices on a baking sheet and drizzle with olive oil.  Sprinkle with oregano and season with salt and pepper.  Bake for 10 minutes.  Remove from oven, spread pesto evenly on each tomato slice, then sprinkle with Parmesan cheese.  Bake for another 7-10 minutes until cheese becomes golden brown.  I turned the broiler on for about 30 seconds just to get a nice crispy crust.  

(Source:  Adapted from Ina Garten)
Print Friendly and PDF

Saturday, August 31, 2013

Spicy Corn Dip

It's Football Saturday!!  In our house, that means one thing - good food and lots of it!  Corn dip has become a staple for football games since we moved to Savannah 6 years ago.  Our friends from Louisiana first introduced it to us and we've been hooked ever since.  She actually served hers warm in small Crock Pot and it was SO good.  This version is a cold version, from my sister-in-law and I think we love it equally as much.  


Probably a bit easier to keep something cold than warm at a tailgate or picnic - we've had this plenty for both types of events!  It's always a hit.   


Serve with crunchy tortilla chips, butter crackers, pita chips, whatever your preference.  Anything that you'll be able to scoop a big bite of this dip!  Kroger now has this blend of cheese called Fiesta Blend - it's shredded sharp cheddar and pepper jack cheeses mixed with jalapeno peppers and spices.  That's what I used this time, but I've also used a Nacho/Taco blend or regular sharp cheddar cheese.  

Spicy Corn Dip

2 cans Mexicorn
1 can Rotel
1 (8 oz) container sour cream
1 cup mayonnaise
1 cup shredded cheese (your choice)
dash sugar

Drain Mexicorn and Rotel.  Mix all the ingredients in a large bowl and refrigerate for a couple of hours or overnight to blend flavors.

Print Friendly and PDF

Friday, July 26, 2013

Pesto Chicken Pizza

I'm not going to lie - this is probably the best thing I've ever made - EVER.  My husband agreed.  I try not to overwhelm my readers with too many pictures, but I could have put like 15 more up.  Not only is it delicious, but it's just an absolutely beautiful dish!


Tomatoes, hunks of fresh mozzarella, a pesto base AND chicken tossed in the pesto - how gorgeous is this?  Hard to believe something this gourmet looking took me all of 15 minutes to put together.  I used my pizza dough, already made (because I always have some in the fridge or freezer) and the Basil Pesto I just made last week. 


 I rolled the dough super thin, so it got crispy and so yummy...this would be so awesome on the grill too! The tomatoes took on this roasted flavor (love roasted tomatoes!) which was just one reason this is one perfect pizza.  I mean look at that melted mozzarella!  

Serves 6

Pesto Chicken Pizza

1 pound Pizza Dough
1 cup pesto (homemade or store bought), divided
1 large boneless, skinless chicken breast, diced
5 Campari tomatoes (or 3 Roma), sliced
1/2 pound fresh mozzarella

Preheat oven to 375 degrees with pizza stone inside.  Cook the chicken with a little salt and pepper, then toss with 1/4 cup of pesto.  Set aside.  Roll out dough on floured surface to as thin as you like.
Pull out the preheated pizza stone, spray with non-stick spray and lay out dough (here's a hint - when you are ready to move the rolled out dough to the stone, roll it up on your rolling pin, carrying it over the stone and roll it back out. Works perfectly every time!).  Spread the remaining 3/4 cup of pesto on dough, leaving about a 1/2 inch border.  Top with chicken, tomato slices, and chunks of mozzarella.  Bake for 15-20 minutes until dough is crispy and cheese is melted. 
  Print Friendly and PDF

Friday, June 21, 2013

Bacon and Tomato Quiche

This quiche would be an amazing brunch dish (breakfast, brunch, lunch or dinner - really any time of day!).   I chose to make it for our dinner a couple of nights ago - I had an extra pie shell and thought why not do something savory?  


I love the brown crispy edges.  This baked up so perfectly!  The tomatoes were a great addition and went really well with the swiss cheese - you can also add peppers, mushrooms, etc. and really make this how you like it.  


This was polished off in no time!  My husband had seconds and even pulled this out for breakfast the next morning!  I was shocked!  He's not a huge leftover person so I took that as a good sign that this quiche was a winner.

Serves 8
Bacon and Tomato Quiche

1 9-inch frozen pie shell
2 cups swiss cheese
2 tablespoons flour
4 eggs
1 1/2 cups half & half
1 Roma tomato, seeded and chopped
8 slices of bacon, cooked and crumbled
1/2 teaspoon salt
1/4 teaspoon pepper

Preheat oven to 350 degrees and place frozen pie shell on 9 x 13-inch baking sheet.  In a small bowl, combine cheese and flour and mix well; set aside.  In a large bowl, beat the eggs slightly, then add the half & half, tomato, bacon, salt and pepper and mix well.  Pour mixture into pie shell and bake for 35-40 minutes or until a knife inserted into the center comes out clean.  Let sit for 10 minutes before serving.

(Source:  Adapted from For the Love of Food

Print Friendly and PDF

Monday, June 3, 2013

Summertime Salsa

I know it's not the official start of summer yet, but it was just Memorial Day weekend, and that pretty much makes it feel like summer.  This salsa is the epitome of summer - fresh ingredients and the freshest of flavors.  

I'm trying to pay a lot more attention to my garden this year - as opposed to other years where I didn't really bother to prune, just kind of picked off what I needed.  It paid off!  I just picked my first (huge!) batch of cilantro.


This salsa is so easy - everything rough chopped, into the food processor, pulse and done. 


Puree it as smooth or chunky as you like it.  My husband and I have to compromise a little so I puree mine so everything is in teeny tiny dices.  You'll actually end up with more of a liquidy salsa the longer it's in the food processor. 


The colors are gorgeous and looks even prettier topped with a little more fresh cilantro as a garnish.  And by the way, I typically double this recipe, even if I'm making it just for our family.  If I don't, it's gone in one sitting.  We are addicted!

Makes about 2 cups

Summertime Salsa

5 Roma tomatoes, seeded and chopped
1/4 cup chopped onion
1/4 cup fresh lime juice
2 tablespoons diced jalapenos (from the jar)
2-3 tablespoons fresh cilantro, leaves removed from stems
2 teaspoons minced garlic
salt and pepper to taste

In the bowl of a food processor, combine all of the ingredients and pulse until it's the consistency you prefer.  Serve with tortilla chips for a snack or as a garnish with tacos, nachos, etc.

Print Friendly and PDF

Wednesday, May 29, 2013

Grilled White Pizza with Tomatoes

Where I live in Georgia, we typically don't have a "Spring" season.  We may have one or two really nice days between March and May but pretty much you can expect it to go straight from winter to the hot stickiness that is the deep south.  This year has been quite the exception.  The weather has been amazing and well, Spring-like!  Low 70's, breezy, no humidity.  Just lovely!  And we have been spending more time than ever outside - playing, eating and cooking. 

We also did this last summer - turned our backyard into a brick courtyard because we cannot grow grass to save our lives (too shady!).  It was the best thing we could have done, so relaxing.  But, onto our dinner!

If you've never tried grilled pizzas, you have to - absolutely amazing.  The dough gets crispy and the cheese melts so perfectly.  It's so easy to do any ingredients you like!  You'll throw the dough on first, so have all of your ingredients prepped and right next to you on the grill.  

  
This makes 2 pizzas (about 9x13" each) and this recipe is for one of them.  We actually did my Ranch Barbecue Chicken Pizza on the other dough.  Just remember to double your ingredients if you want to do this white pizza on both.


Grilled White Pizza with Tomatoes

1 pound pizza dough, divided into 2 equal pieces
2 tablespoons olive oil
1 tablespoon minced garlic
1 Roma tomato, sliced
1 cup shredded pizza cheese (mix of mozzarella, Parmesan and Romano cheese)
2 tablespoons Italian seasoning

Preheat your grill to medium.  Roll the pizza dough very thin (in whatever shape you like) to about 9x13" and place on a baking sheet.  Combine the olive oil and minced garlic in a small bowl.  Carry the dough, tomatoes, cheese, olive oil mixture and a pastry brush out to the preheated grill.  

Carefully lay the dough onto the lower part of the grill and immediately brush the olive oil and garlic onto the dough.  Place the sliced tomatoes, followed by the shredded cheese and Italian seasoning.  Close the lid to help the cheese melt a little but it doesn't take long for the dough to cook - about 4-5 minutes.  Keep checking and pull off when dough is crispy and cheese is bubbling and melted.  Cut into bite size squares.         
Print Friendly and PDF

Monday, April 15, 2013

Bruschetta Pasta

It's getting to be that time of year again...weather is getting warmer, I have basil growing in my backyard and tomatoes are more readily available.  All this combined made me really hungry for Bruschetta - chopped tomatoes with basil, olive oil and balsamic vinegar - and I thought instead of just making that served with crostini, I could just toss it with some pasta for a quick no-cook sauce.  It was excellent!  So great for a hot summer night when you don't feel like slaving over a hot stove (except to make the pasta of course).  I also included the recipe for the crostinis (little toasts) because I served them with our pasta.  

Serves 4-6

Bruschetta Pasta

1 pound thin spaghetti 
6 plum tomatoes, chopped and seeded
2 teaspoons minced garlic
1 tablespoon olive oil
1 tablespoon balsamic vinegar
6-8 basil leaves, chopped
sea salt and black pepper to taste
freshly grated Parmesan cheese (optional)

Crostini
1 baguette of French bread
1/4 cup olive oil
1 clove garlic

Prepare pasta according to directions.  Follow the next steps while the pasta is cooking.  

Preheat oven to 450 degrees.  Slice the baguette in 1/2 inch slices and arrange on a 9 x 13-inch baking sheet.  Using a pastry brush, brush a small amount of olive oil on each slice.  Toast for 5-6 minutes until they start to turn a golden brown.  Once removed from the oven, rub a little bit of the garlic clove onto each piece of toast. 

Chop and seed tomatoes while bread is toasting.  In a medium bowl, toss with the olive oil, balsamic vinegar and basil leaves.  Season with salt and pepper.  Set aside.  When the pasta is done, drain and return to the pot.  Toss with the tomato mixture and top with Parmesan cheese (if using).

Print Friendly and PDF

Friday, January 11, 2013

Pizza Margherita

Pizza is a couple-of-times a month staple in our house.  It's a quick and easy meal, and part of the fun of it is making our our pizza dough!  The recipe I use for my pizza dough is so good and takes just minutes to prepare.  And I LOVE this style of pizza - light and garlicky, without a true tomato sauce, instead, it has slices of Roma tomatoes.  An authentic Margherita pizza is actually made by crushing the tomatoes into a sauce, but I love the look of the slices. 


Cool story - Pizza Margherita was named after Queen Margherita of Italy visited Naples and she was served a pizza resembling the colors of the Italian flag - the red is the tomatoes, white is the mozzarella, and green is the basil.  Basil was no where to be found at my local grocery store, so I did leave it off, replacing it with a sprinkle of Italian seasoning right before baking (which contains basil!).


I always leave my pizza just a little longer after the cheese has already melted.  I love it when the mozzarella gets golden brown and a little crispy.  


I used a pizza stone and made a round pizza, but this recipe will stretch out to a 9x13 or even 11x18 pan (depending on how thin you want your crust).  And I chose to cut my round pizza into squares so the little ones could eat it easier.  


 Pizza Magherita

Pizza dough
1 tablespoon olive oil
1 teaspoon minced garlic
2 Roma tomatoes, sliced thin
1 1/2 cups shredded pizza cheese (or mozzarella)
3-4 slices of fresh mozzarella, cubed
1/4 cup grated Parmesan cheese
1 tablespoon Italian seasoning
1/2 teaspoon garlic salt (optional)

Preheat oven to 375 degrees, let pizza stone get hot.  Roll out dough and place it on warmed stone.  Sprinkle with the olive oil and garlic and rub all over the dough (you can leave a border for the crust or go all the way out).  Top with the tomatoes, spaced evenly apart, then top with the shredded cheese, fresh mozzarella, Parmesan, Italian seasoning and garlic salt if using.

Bake for 12-15 minutes until all the cheese is melted and pizza dough is cooked.  Cut into slices or squares.

Print Friendly and PDF

Sunday, December 9, 2012

Tomato Avocado and Mozzarella Panini

Tomato and Mozzarella sandwiches are one of my absolute favorites and we eat them often in our house.  But adding avocado and turning it into a panini definitely took our staple sandwich way up a notch.  Absolutely amazing!   


Quite frankly, eating it like this, without toasting the bread is fabulous as well.  I used Campari tomatoes (the smaller ones) and fresh slices of mozzarella.  


Gooey mozzarella and creamy avocado...are you drooling yet??


Makes 2 sandwiches

Tomato Avocado and Mozzarella Panini

2 fresh ciabatta rolls 
2 Roma or Campari tomatoes, sliced
6 slices of fresh Mozzarella
1 avocado, sliced
Mayonnaise (optional)
Balsamic vinegar
Italian Seasoning
Sea salt and fresh ground pepper

After everything is sliced, spread the mayonnaise on open sides of the ciabatta rolls.  Preheat your panini maker or skillet.  Layer 3 slices of mozzarella, 2-4 slices of tomatoes (depending on which you use), and a couple of slices of avocado on each roll.  Add a couple of splashes of balsamic vinegar over the layers, followed by a dash of Italian seasoning and salt and pepper to taste.

Place sandwich on panini maker and close the lid.  Allow the bread to toast and the mozzarella to melt a little, about 7-10 minutes.  You can also use a skillet with a panini press.

Print Friendly and PDF

Wednesday, November 7, 2012

Mexican Chicken Soup with Limes

This is a very light, although very spicy, quick and easy soup!  It could easily be thrown in the Crock Pot but I started it too late in the day so I used my stove top.  The ingredients came together in minutes and I even threw in my chicken breast still frozen.  It will simmer for about a hour to cook the chicken, but I didn't even look at until the hour was up and it was time to shred the chicken.

I found this recipe on the blog, Budget Bytes, which I love because she breaks down the cost of each ingredient and the total recipe cost.  So, this soup is tasty and super cost friendly!  


I love the sourness from the lime juice that gets squeezed in at the end.  And the creamy, coolness of the avocado takes the bite out the spiciness.  And it is spicy!  That tickle the back of your throat spicy...my husband I were clearing our throats and coughing a bit while eating this.  You can absolutely omit the jalapeno if you want to cut down on the heat.  

 Serves 4

Mexican Chicken Soup with Limes

2 tablespoons olive oil
1/2 medium onion, diced
2 stalks celery, diced
1 tablespoon minced jalapeno (I used from a jar, but you can use 1 medium fresh)
4 cloves garlic, minced (I used minced from a jar which would be 2 tsp)
1 large chicken breast
6 cups chicken broth
1 can diced tomatoes with chiles, 14.5 oz
1/2 tablespoon cumin
1 or 2 limes
1 avocado

In a large saucepan or dutch oven, heat olive oil over medium heat.  Cook the onion, celery, jalapenos and garlic in the olive oil for about 5 minutes or until tender.  Add the chicken breast, chicken broth, tomatoes and cumin to the pot.  Bring it to a boil over medium-high heat, then reduce to medium-low, place a lid on top and let simmer for one hour.  

After simmering for an hour, remove the chicken breast from the pot and shred with two forks.  Return the meat to the pot.  Squeeze the juice of 1 or 2 limes into the soup.  Serve and top with a few chunks of avocado and tortilla chips.  

(Source:  Adapted from Budget Bytes)

Print Friendly and PDF

FREE eCookbook!

Search

My photo
I'm a super busy mom of 3 and a Beachbody coach. Follow along as I try to find a balance between eating good food and keeping my family healthy and happy! We eat mostly clean with a few fun treats thrown in every once in awhile. Thanks for stopping by!

What I'm Pinning...

I'm on Instagram!


Rivit Media
PublisherMunchkin Land Designs
 
Designed by Munchkin Land Designs • Copyright 2012 • All Rights Reserved